The First Panorama
Panoramic photography began in the USA with an 1851 scene of San Francisco. Few panoramas were made in the early years of photography. Cameras were expensive and the development skills and printing time of placing two or more Daguerreotype plates next to each other was too involved for the majority of those who held a camera.

This article is for beginners who want to try panoramic photography. Today, different softwares let us easily make digital panoramic photographs. We can stitch panoramas with 3, 5, 10 or even more frames. We’ll see how to capture and craft a panorama with ON1’s built-in panorama assembler in 4 easy steps. As of this writing, ON1 produced a new version, version 2018.5.1, with a performance boost and free trial.
Capturing Your Panorama
Start with 3, 5 or 7 frames. Your panorama does not have to be immense, just wider than the usual coverage.
Level your camera on a tripod. Turn off VR and AF and use manual focus, manual exposure mode. Overlap each frame with the next by about 30-50% or more than you think you’ll need, as the extra duplicated space helps the program stitch your frames neatly. If you don’t have a tripod, try to brace well and use your body as a tripod with elbows and legs braced.
Capture your frames in Manual exposure mode. In Manual, your camera will not vary exposures, producing inconsistent exposures across a series of frames as the light changes. Avoid Exposure mode for this reason. For the aperture setting, try lens openings in the F/5.6 to F/11 range depending on the sweet spot of your optic.
Now, depending on your subject matter, you can frame vertically or horizontally. Pay attention to light and composition. Try to have interesting subject matter at the far left and far right of your scene.
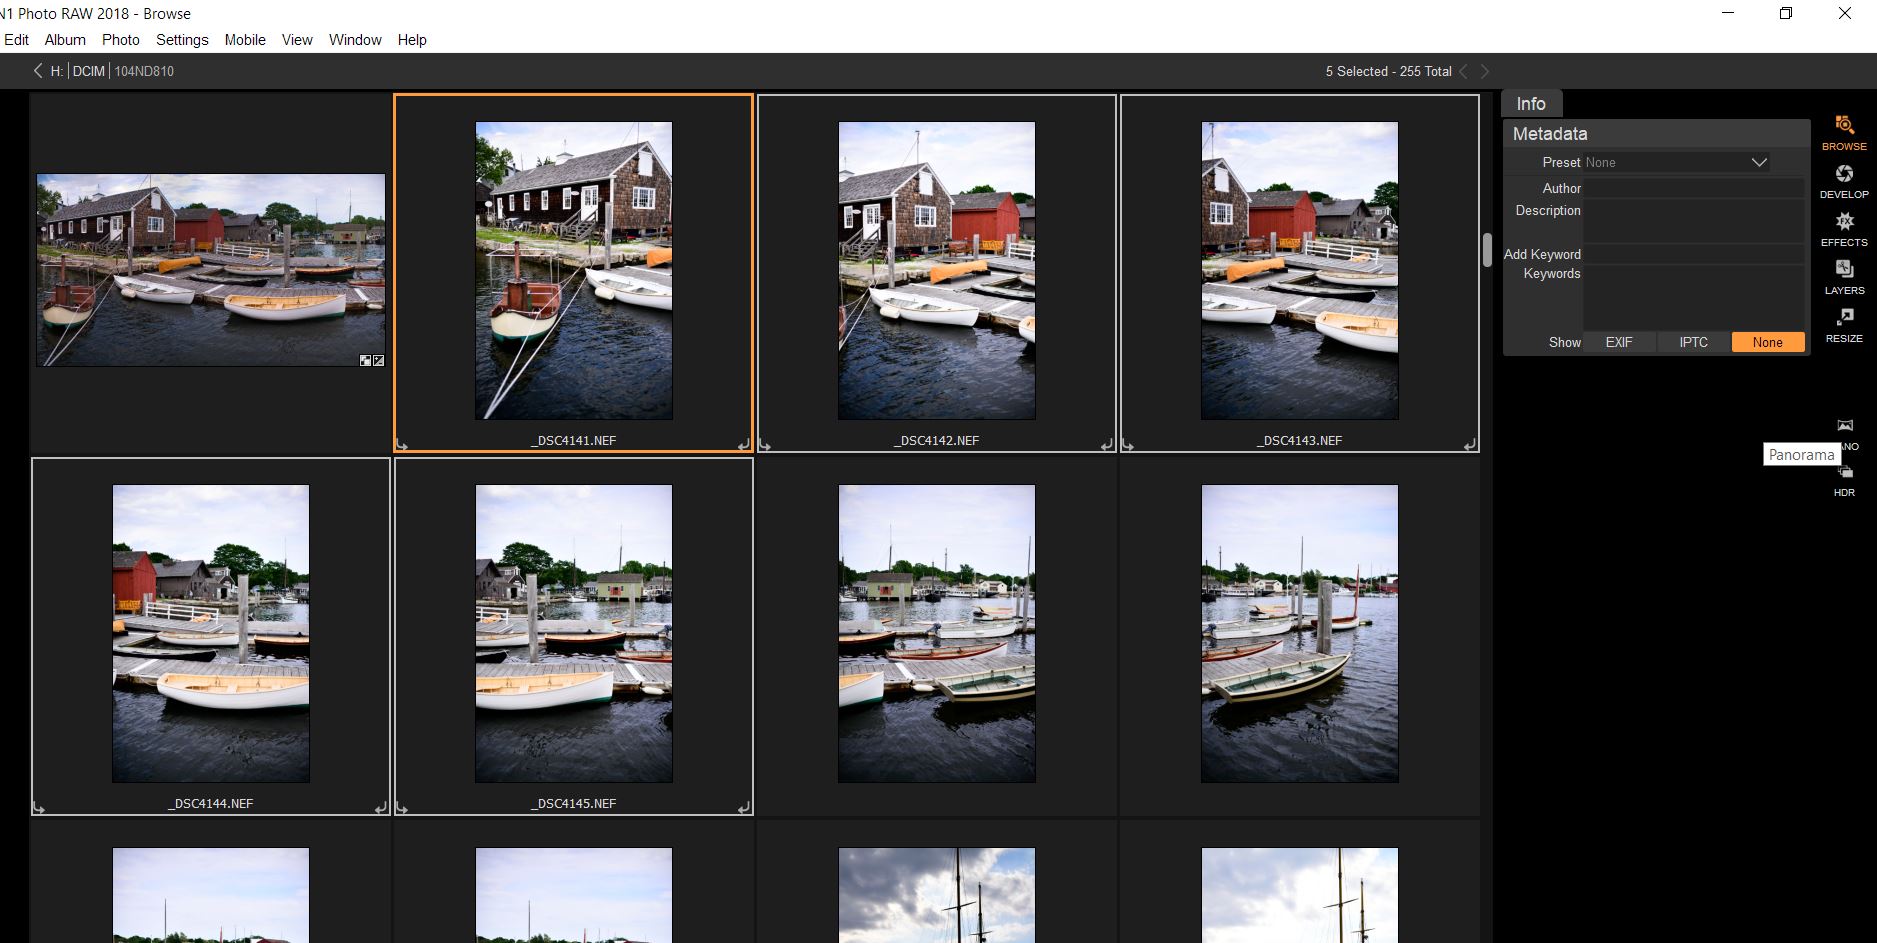
To locate the images in the Browse window of ON1, (shown above) after I download, I like to hold up 1 finger in the frame, make an image, then start a panoramic series. Then, I hold up 2 fingers and take another throwaway frame. The two throwaway frames let me see where each panorama starts and stops when looking over many images in the Browse window to quickly locate which ones are panoramas. Then, I use one of the 5 colors in ON1’s color labels to tag the panoramic frames.
Processing Your First Panorama in ON1 Software
Step 1: Open ON1 Photo RAW 2018 (version 2018.5 as of this writing) and Click File > Import… to bring your files (JPEG or RAW) into the editor.
Choose your destination, the folder where you’ll place your photos. Choose to Rename the Images by location, date or subject type. You’ll see buttons for Browse, Develop, Layers, Pano and HDR at the right of the ON1 work areas window.
Click Browse. Hold down the SHIFT key and Click the first and last Frames of your pano series. Do not include the frames with 1 and 2 fingers held before the lens.
STEP 2: Use a light touch to edit for contrast and sharpness before you merge the frames.
STEP 3 – TWO OPTIONS:
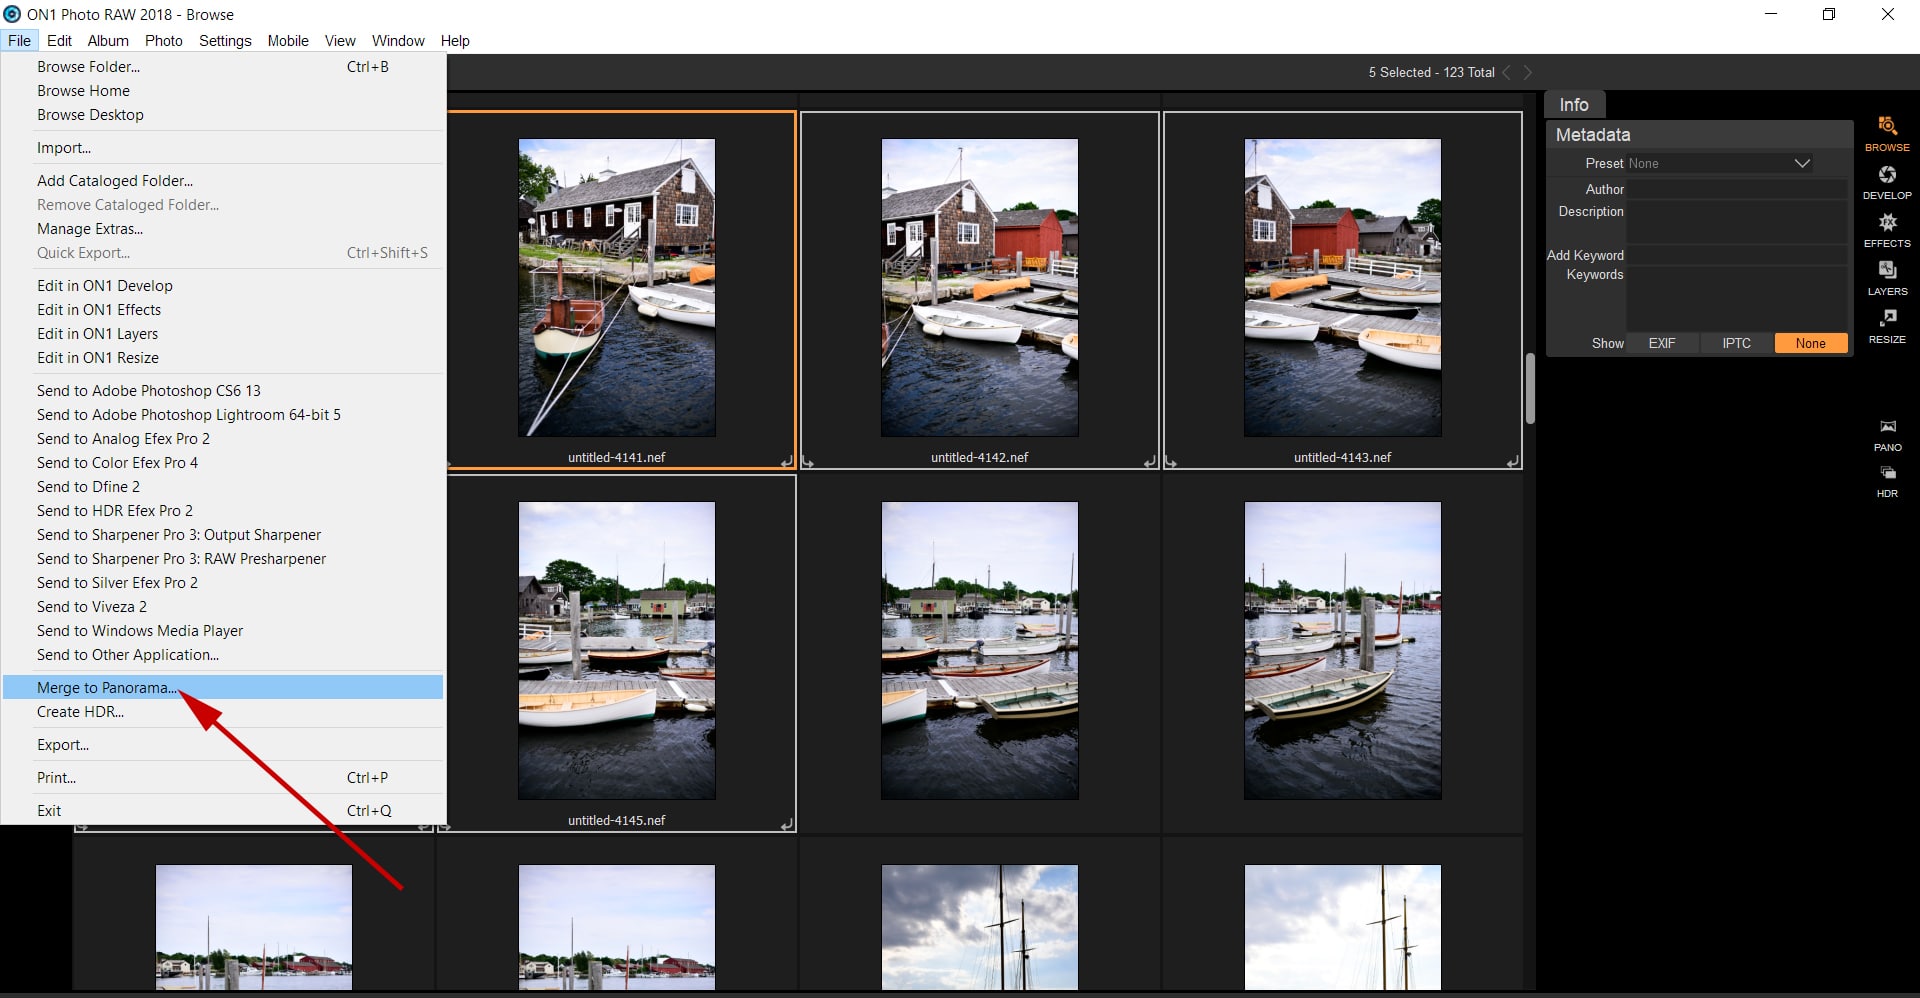
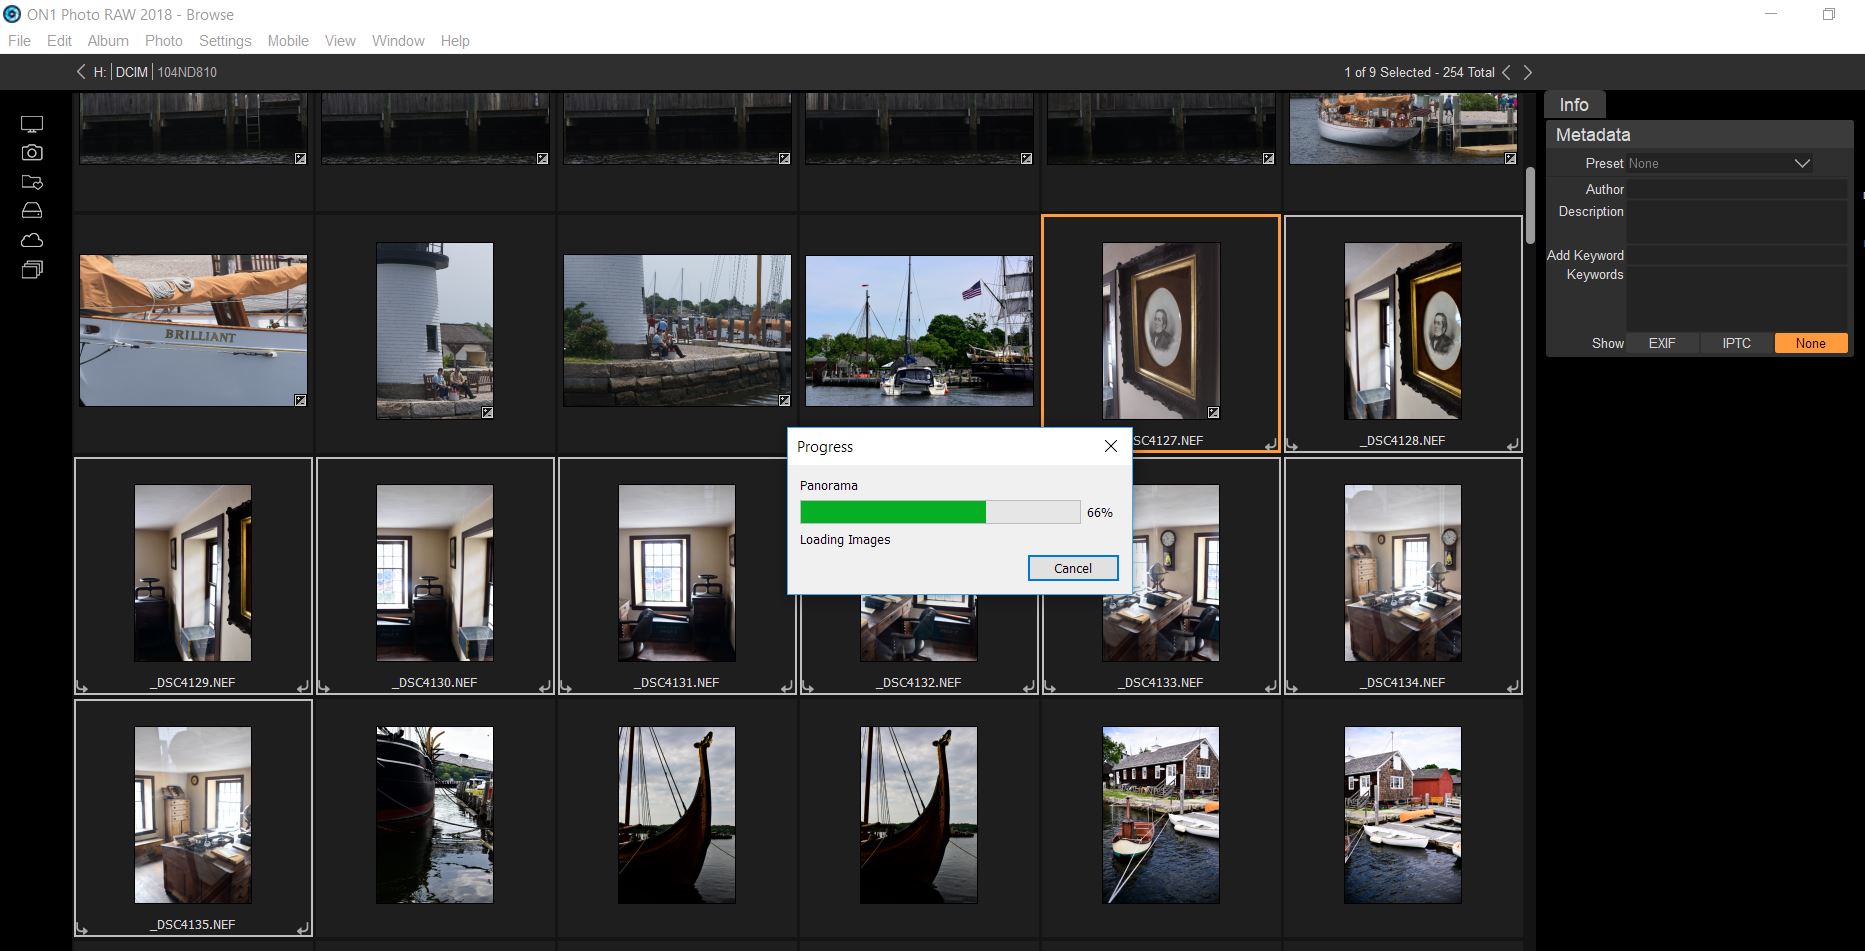
Option A: You can Click the Pano button at frame right, or Click File > Merge to Panorama. The preview window will display an update that shows you Progress Panorama Loading, Estimating and Composing, shown below with a 9-frame pano stitch.
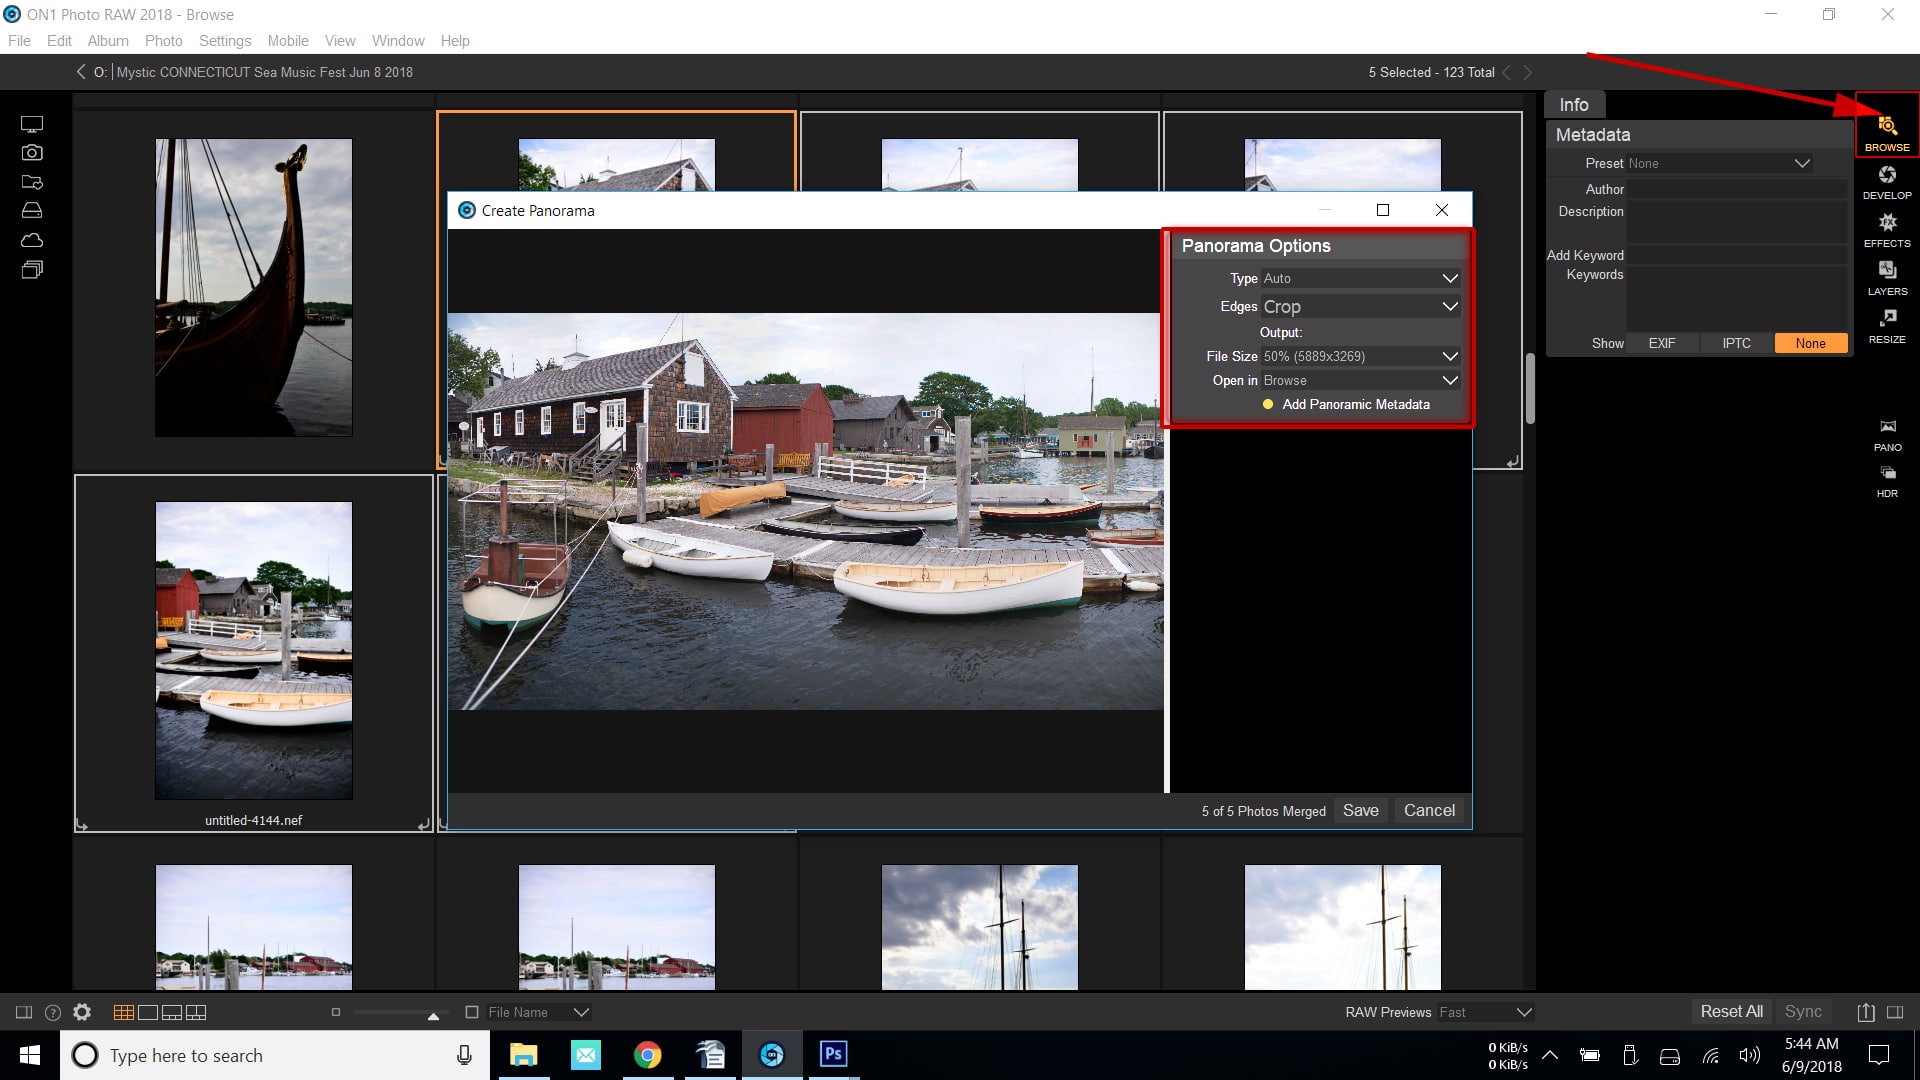
Option B: Panorama Options. Click Auto, Crop, 50%, Open in Browse. You can add metadata if you choose.
STEP 4: Click SAVE and choose between a TIFF file and a PSD file. You’ll see a progress bar. Congrats, you’ve succeeded, and your panorama will appear in the Browse window.
Best Practices for Panoramic Photography
To improve your panoramas, you may want to use a “best practice” workflow. Check these off your checklist:
- Make sure your sensor is clean to avoid dust on the sensor causing sensor dust in your images.
- Avoid wide open apertures.
- Use a tripod, keep each shot level and consistent, overlap by 30% to 50%, and then add Lens correction.
- Edit each individual frame with ON1 Global Edits such as tonality or exposure to help the program stitch. You may want to use Local Adjustments in the ON1 Effects Tool, but we’ll save that for another article.
Solving Issues & Troubleshooting
If your panoramic series comes out distorted, try rotating the photos first, then stitching them. Think horizontal with vertical framed panoramas. Photo RAW at times has a tough job of merging panoramas taken with frames shot from ground to sky. So, if this happens, try rotating your captured frames 90 degrees. Next, stitch them together, and then rotate them back 90 degrees, (along with the finished panorama) to the way you shot them originally.
ON1 Panorama is in Beta as of this writing, so if it cannot stitch a series, I try reducing the number of frames, say from 9 to 5, and also lowering the output file size from 100% to 50%. If the pano does not complete, and you get a 215 error, it is caused by not having enough memory. Break down the task and divide it: stitch just 2-3 photos at a time, then combine these smaller segments together.
Secrets & Updates
The secret to successful panoramas is to think about each part of your scene and its contribution to the whole concept.
Update: The new Version of ON1 Photo RAW 2018.5.1 is available as of June 2018 June. New customers can purchase version 2018.1 today and receive 2018.5 as a free update once it becomes available. ON1 is about $100 for new customers for a limited time. Owners of previous versions of ON1 can also upgrade for $79.99. Version 2018.5 is a free update for all owners of ON1 Photo RAW 2018. I want to thank Craig Keudell and the team at ON1 for providing the software for this review.