
Photography is often referred to as painting with light. When we talk about painting with light we talk about the process of creating a photograph. Photography derives from the Greek where photo means light and graph stands for painting. So let’s review the quality, quantity, direction and how we can manipulate light to our advantage for exceptional photography.
“Nothing is repeatable especially the light”. – Bob Croxford
Quality of Light
“The moment you take the leap of understanding to realize you are not photographing a subject
but are photographing light is when you have control over the medium”. – Daryl Benson
The best time for photography is the early morning or late afternoon hours of a day.
When the sun rises or sets the quality of sunlight paints our photographic objects in warm hues. Approximately 1 hour before and 2 hours after sunrise or 1 hour after and 2 hours before sunset provide the so called golden hours of the day.
During this time we experience lighting conditions that bring out the entire texture of our photographic objects in warm and pleasing colors.
Cloudy, overcast days provide soft lighting conditions. This type of light evenly illuminates our subjects, thereby achieving beautiful detail throughout the frame, including highlights and shadows.
Since an overcast sky does not typically add to the composition of an image, we usually like to eliminate it from the frame. However, rules are meant to be broken and you are the artist, so you get to make your own artistic statement with your image.
Sunlight during midday is harsh and adds very little to our photography. There is minimal detail in the darker areas of the picture and colors are often blown out.
This is the time that’s best suited for resting from the early morning photo session, catching up on things or scouting photo locations for your late afternoon or evening photo sessions.
Quantity of Light
“Light meters read; photographers interpret”. – Catherine Jo Morgan
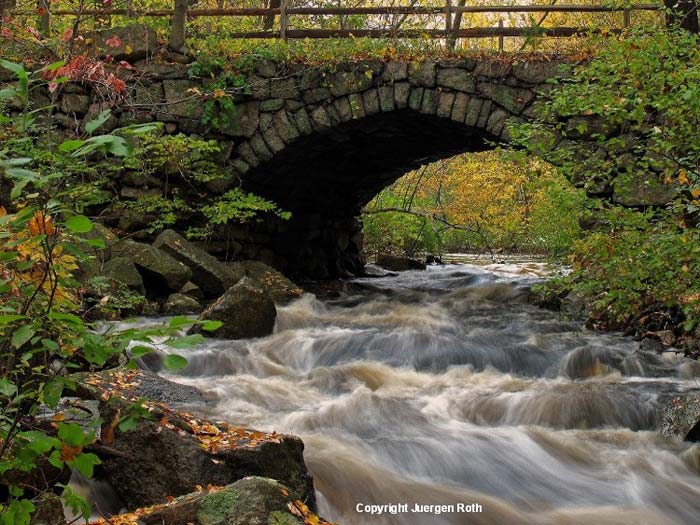
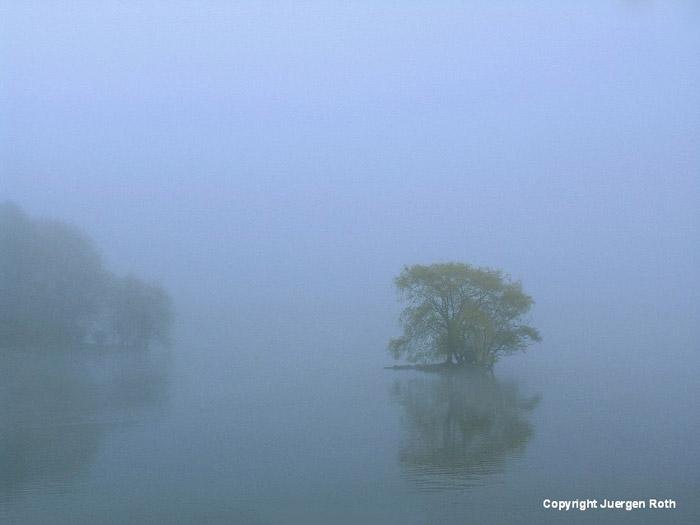
Bright light transfers into fast shutter speeds thereby enabling us to freeze action or movement within our camera. Low light slows down shutter speeds and motion becomes more blurry as in the intimate landscape photography picture of the New England cobble stone bridge over Sudbury River.
Our camera provides us with the required controls to compensate for slow or fast shutter speeds. These controls are ISO, aperture and shutter speed, a.k.a. exposure time, settings which make up for a correct exposure.
Understanding exposure and how ISO, aperture and shutter speed correlate is critical for a high quality photograph and one should always strive for the highest quality image. I usually select the lowest ISO camera setting (ISO100 and smaller) to minimize camera noise and capture more detail.
I then choose the aperture depending on my photographic goals and the amount of depth of field to capture my vision.
Choosing a small aperture or f-stop setting (large f/numbers such as 11 and greater) will slow down shutter speed but maximizes depth of field and is mostly desired when photographing grand landscapes or city skylines. In such photos we strive for sharpness and detail from the nearest picture element in the foreground all the way to the horizon.
A large aperture (small f/numbers such as 5.6 and less) selection will provide fast shutter speeds and is mostly desired when capturing action or motion (i.e. birds or sports) with our photography. In these types of photos we strive for a quiet backdrop that beautifully isolates the main subject from any distractions in the background and solely lays the focus on the main subject.
Note: If you use a tripod, you do not need to worry much about slow shutter speeds.
Direction of Light
“Available to all photographers free is the one light source given by a window which faces the north. It’s a painterly light that any face or still life comes alive in”. – Garry Camp Burdick
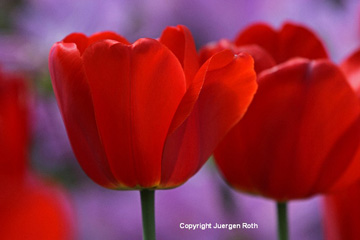
Red on Pink
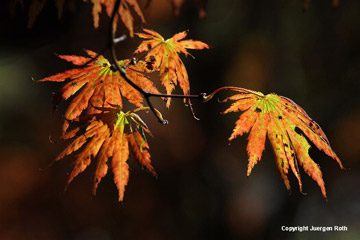
Maple Glow
Backlight
Backlighting is achieved when the subject is lit from behind. Besides sidelight, it is the most spectacular light for which we can aim. It works magically in macro photography where the high contrast makes the photographic subject glow from within.
It is also beautifully used with translucent objects like tulip flowers or tree leaves which add drama and abstraction to an image.
I love when the morning or afternoon sunlight strikes and illuminates the colors of fall foliage.
In the photo of the maple tree leaves from the inspiring Boston Arnold Arboretum the goal was to isolate a branch with four maple leaves in peak New England autumn colors. The leaves were sun-kissed while the background made out of shrubs and other tree foliage remained mostly in the shade.
Using a polarizing filter further darkened the shadow parts, added more drama and enhanced the natural green, yellow and orange colors. The polarizer also eliminated any unwanted and distracting glare on the foliage.
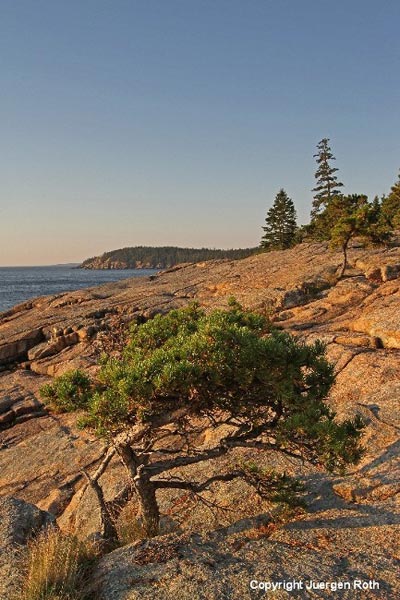
Sidelight
“Where light and shadow fall on your subject – that is the essence of expression and art through photography”. – Scott Bourne
Sidelight is very beneficial to capture form and texture of our photographic objects. It provides a motif with well lit subjects and shadows. These elements make a picture come alive and help to convey spatial depth.
In magical Acadia National Park, finding this tiny evergreen tree that looked like a cute little Bonsai tree in this grand Maine landscape was priceless. The tree made for a perfect foreground subject that conveys depth and perspective of the rigid seacoast.
The beautiful morning sidelight was striking the rigid coastline and brought out the form and texture of the evergreen tree, granite rock seacoast and Otter Cliff in the far distance.
Front Light
Front light is achieved when the subject is directly lit from the front. It is not very beneficial in landscape photography because texture and form will be lost and a photograph often appears flat, but it can be useful for macro flower and raindrop photography in order to capture details and the glint of light on droplets of water.
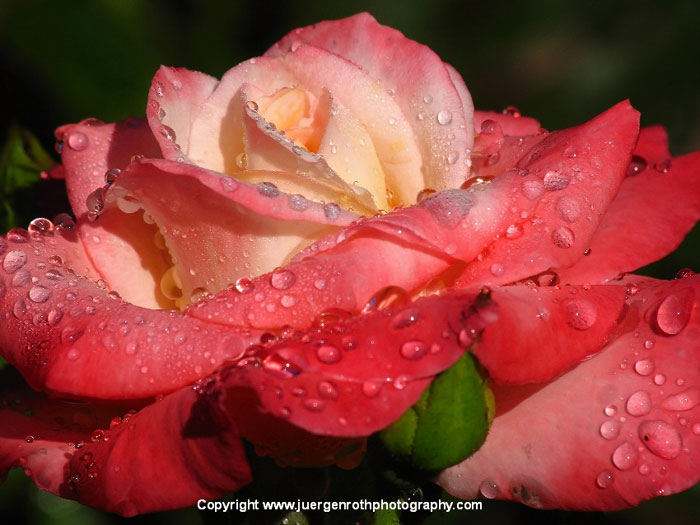
Full Bloom
Usually an overcast sky is best suited for flower photography, but in this rose image I dismissed this rule. I was intrigued by the early morning, sunlit red rose covered with raindrops. The front light created a sun filled, color saturated, high contrast image that provides exceptional fine detail throughout the entire.
The high contrast made the droplets appear as bright shiny diamonds and added the extra twist to make it work.
Twilight or Night Light
“To learn the magic of light, get up before sunrise … and watch.” – Ted Grant
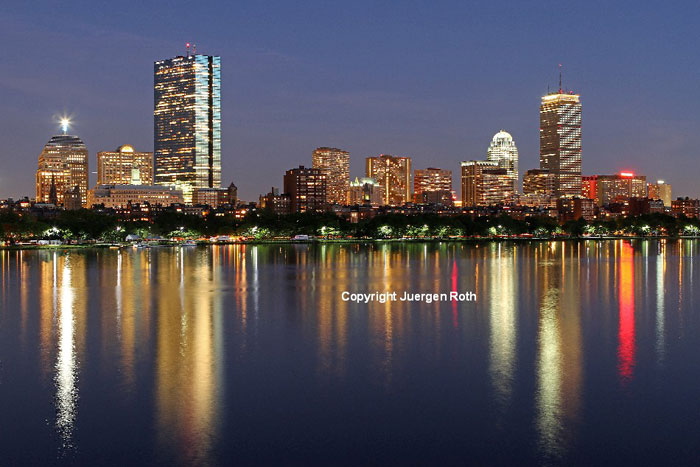
Twilight or night light makes for spectacular landscape and city skyline imagery.
The best time is 20 to 45 minutes after the sun has set. The optimum light does not last long and is hard to predict, so be sure to get to your location prior to sunset, set up your tripod and camera, so you’ll be prepared to fire away once the sun sets and disappears on the horizon.
This approach requires sufficient battery power and flash card memory to keep shooting while closing in on the optimum light. The twilight effect also works on cloudy days where 30 plus seconds exposure times are not unusual.
My last visit to Acadia National Park in Maine coincided with a full moon and planning ahead was essential to take advantage of that.
I scouted for suitable locations along the granite coast shoreline the previous day. The next evening I made my way back to the promising location and set up my tripod and camera near a tiny tide pool and patiently waited for the magic to unfold.
It did not disappoint and I was rewarded with spectacular lighting enhanced by a beautiful moonrise across the Atlantic Ocean. The portrait format in combination with a low camera point allowed me to include the moon and its reflection in the tide pool into the composition and a wide-angle lens conveyed good spatial depth.
I metered and manually focused on the granite coast in the foreground. A spit neutral density filter reduced the light on the moon, sky, and soft layer of pink clouds while the foreground was sufficiently exposed.
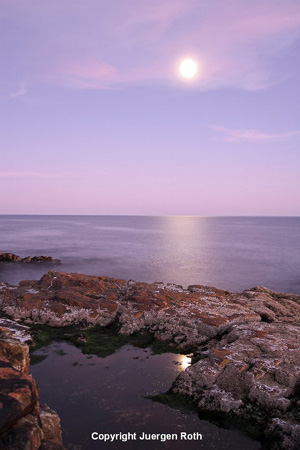
Moonrise in Acadia National Park
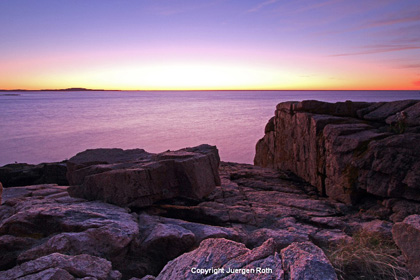
Morning Bliss
In the image titled Morning Bliss, I used twilight before sunrise in Acadia National Park to my advantage. Arriving early enough to set up and find a suitable location was crucial. I then followed the same approach as mentioned above to close in on the optimal light and convey the outdoor experience of a beautiful sunrise into a memorable photograph.
Influencing the Light
“Light makes photography. Embrace light. Admire it. Love it. But above all, know light. Know it for all you are worth and you will know the key to photography.” – George Eastman
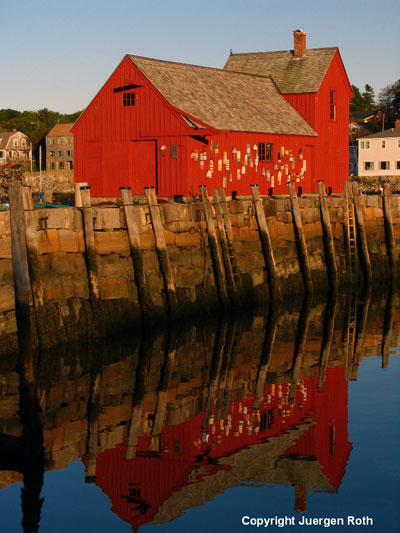
Cape Cod Fishing Shack
Polarizing Filter
Always strive to capture the optimal image in the field and keep the software post-processing to a minimum. A polarizing filter screws to the front of the camera and when the filter is rotated, it adjusts the amount of polarized light reflecting from the photographic subject.
A circular polarizing filter boosts color and balances the contrast; it eliminates glare and reflections. Think of it as sunglasses for your camera. Overall, these filters increase color saturation, boost a blue sky, add cloud contrast, controls reflections, and add neutral density (as a neutral density filter) to lengthen exposure times for blurred, impressionistic images.
When buying a polarizing filter, ensure to purchase one for your largest lens diameter. Lenses with smaller diameters can be equipped with adapters allowing the larger filter to be mounted on the smaller sized lens. This will keep you on budget and lowers the weight of your photo gear in the field.
In the picture of the red fishing shack in Rockport, aka Motif #1, so called because it is the most often-painted building in America, the polarizer darkened the harbor water by eliminating unwanted bright sky reflection.
The photo filter also saturated the red color of the fishing shack and the blue hues of the sky.
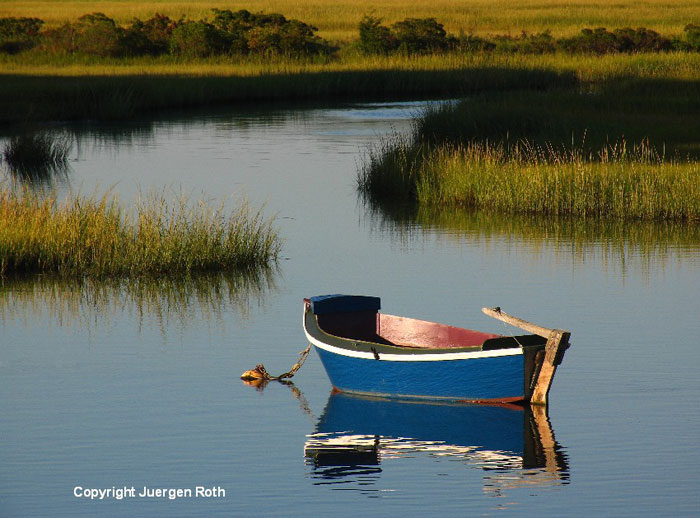
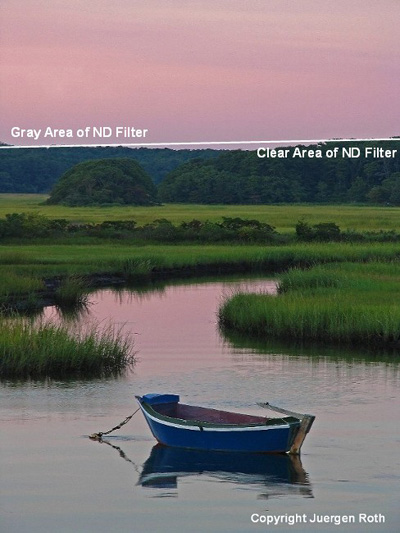
Split Neutral Density Filter
Overcoming high contrast condition is not a mission impossible in photography. We as photographers are often challenged by difficult lighting conditions due to the high contrast of a sunset sky and the darker landscape scenery in front of us.
In the picture of a blue dinghy on Cape Cod, I was challenged by those exact conditions. When I metered on the beautiful pink, sunset sky, the grass and dinghy become too dark with limited detail. On the other hand, metering on the marshland and blue boat provided decent detail in the landscape, but blew out the sky, leaving it washed out.
As a solution I metered on the blue boat, which provided a correct exposure setting for all elements in the foreground. Then I positioned a 1 stop graduated neutral density filter in front of my lens, placing it near the edge/horizon where sky and landscape met.
This reduced the incoming light on the sky and clouds, while at the same time, maintaining their colors. Now all below the horizon were correctly exposed for a landscape photo with strong foreground composition and impact.
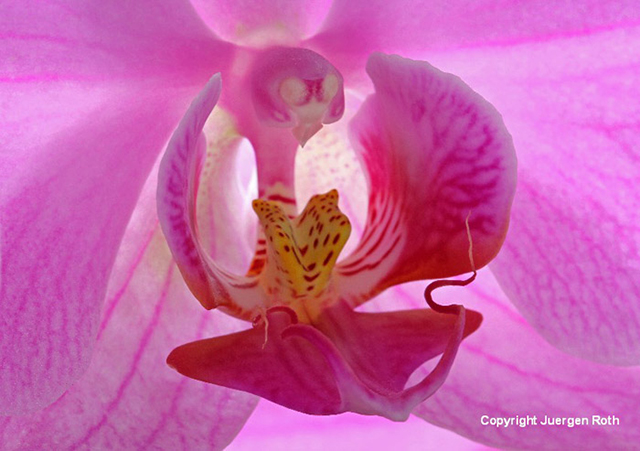
Reflectors
Reflectors are used to enhance the light and direct the light towards a shaded area of a subject. For instance, a reflector can enhance the shaded elements of a flower when it is facing away from a window or light source. You get to control the light here. Just adjust the reflector/s (white card boards work too) and explore the impact of the lighting on the flower.
 .
.
Wide Awake
Adjusting the light with reflectors is also a great learning experience and often leads to more inspiring and beautiful fine art photography. There are certain positions when a reflector unleashes maximum impact and it is our job to explore the best impact by rearranging and adjusting them in different angels or slants.
“It is the photographing of ordinary things, in extraordinary light,
which results in extraordinary photographs”. – David Young
by Juergen Roth
All text & photos: © 2012 Juergen Roth. All rights reserved.
Leave a Reply