
Collage: © 2014 Marla Meier. All rights reserved.
Redundancy, Redundancy, Redundancy…
I was 13 years old when man triumphantly walked on the moon. One of the finer attributes of NASA and the space program was the concept of redundancy. It was one of the reasons that Apollo 13 made it back safely. There was a backup for every system, and even the backups had other backups. In the harsh and unforgiving environment of outer space, nothing was left to chance.
You should be treating your digital files the same way. This lack of redundancy in archiving your digital files is one of the weakest links in digital imaging. Your images are too important! Develop a backup strategy, and do it “now” rather than later.
I cannot tell you how many horror stories I’ve heard from clients who had all of their images on a hard drive that failed. They, of course, lost all of their files – all of the blood, sweat, tears, expense, and creativity that went into creating those images was gone forever.
Bottom line…
~ Be like NASA – Be Redundant!
~ Don’t use one strategy – use more than one. Better safe than sorry!
~ Make your archiving system redundant and back up at least twice on different media.
So, what can you do? Here is a 3-Step approach that should care of everything (in order of importance):
Step 1: Back Up Offsitethrough the Web
One of the best ways to backup and protect your images is to use an off-site web-based backup service. Your images are protected in the event of theft, accidents (fire, flood, etc), or natural disaster. I consider this step mandatory, and even more critical than backing up onsite!
I’d recommend checking out services such as iDrive, Carbonite and Mozy. For less than $100 a year, you can automatically back up the data on your entire computer. It is “cheap insurance” and extremely easy to use, even if you’re not a “techno-geek”. I’ve used all of the services listed over the years, including recovering from hard drive crashes, and they work great!

Because I have lots of files (some of them quite large), I also use an additional web-based service called OpenDrive. For less than $15/month, I can store up to 500 GB offsite. Think of it as a manual “cloud”, although there is some automation.
Step 2: Back Up Onsite
Here’s a suggested (and relatively inexpensive) way of backing up your images onsite:
~ You have the original files on your computer’s hard drive.
~ Buyan external Hard Drive or Flash Drive from your local Best Buy, Office Depot, Costco, etc. They’re available for anywhere from $20 on up depending on the amount of information to be stored.
~ Back up your important images to the external hard drive or flash drive. Back up ONLY your images and important data. There is no need to back up programs.
By the way, if you are on a Mac, upgrade to OS 10.5 or later immediately. The “Time Machine” feature is worth the price alone. Not only does it back up your complete computer to an external hard drive – the OS, Data, and applications, including multiple hard drives on your Mac – but it allows you to go “back in time” to retrieve a file that you’ve deleted days or even weeks ago.
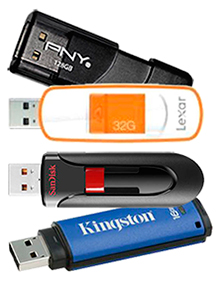
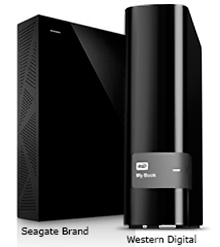
Flash Drives and External Hard Drives
These are merely various brand examples.
Choose whatever brands you prefer.
Step 3: Back Up Onsite and Store Offsite
A slightly more expensive but better solution (one that I use): Buy two identical external hard drives and rotate them weekly. While one is hooked up to your computer, store the other one offsite (home, office, safe-deposit box, etc).External hard drives are fairly inexpensive – around $100 for a 500GB USB/Firewire drive that includes basic backup software. (I use Western Digital’s “My Book” series.
This also assures that should lighting strike and blow the computer and one of the external hard drives, you have another external drive that is in safe keeping.
So here’s an example of how I make sure I’m “backed-up”:
First, I’m on computers that A) use iDrive (with automatic backup) and B) have external hard drives connected to them via USB/Firewire/Network.
Next, let’s assume I’ve got a file on my computer called “MustSave123_M.tif”. I want 3 copies total (double redundancy), and I’ve already got 2 copies (redundancy) saved: one on the internal hard drive of my computer, plus (eventually, depending on the file size) one on iDrive, which is saved offsite.
Finally, I’m going to save this file to a designated spot on my external hard drive. Now I’ve got 3 copies. Not only that, but as I rotate identical external hard drives, my 3rd copy is (eventually) offsite.
Key thought: It’s better to be a bit messy and backed up than to not be backed up at all.
If you get busy (like we all do) and don’t have time to look through your external hard drive to find a specific location to save a file, then try this:
Create a Master Back-Up Folder on your Desktop, and save files that you want to “back up” directly into this folder as your day progresses. I call mine “Clean this up!” That’s because my Master Back-Up Folder serves 2 purposes. 1) I can organize when I’m less harried, and 2) I’m assured of “redundancy” as I’m in the habit of saving this Master Back-Up Folder to my external hard drive daily.
by John Watts, Watts Digital Imaging
© 2014 John Watts, Watts Digital Imaging. All rights reserved.
Leave a Reply