
The Document Window:
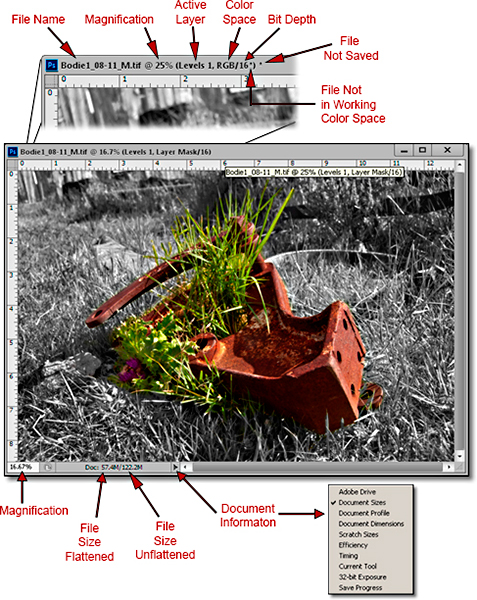
There is quite a bit of information that can be gleaned from the Document Window, without opening separate menus to find that information elsewhere. Take a look at these items – highlighted in red in the diagram below. Some of these items need no explanation and some may not make sense right now, but we’ll explore them in other articles.
A few things to note:
I personally like to have the Ruler turned on as it seems to give the image a sense of perspective. Go to “View” menu-> “Rulers”.
If your open document has not been saved, you’ll see an asterisk OUTSIDE the parentheses of the file name.
Note: You may not see this very often! If your “Color Working Space” for the open document is different than what you set as your “Default Color Working Space” in your “Color Settings”, there will be an asterisk to the right of “Bit Depth”, and INSIDE the parentheses.
By the way, we’ll discuss Color Working Spaces, Color Settings, and General Preferences in next month’s article.
Changing Numerical Values:
There are three main ways to change the numerical values in Photoshop’s various tools, adjustments and functions (and Adobe Camera RAW Plug-in):
1. Move the desired slider with your left mouse button held down to increase or decrease the value. This works well for coarse adjustments.
2. With your cursor placed in the numerical value box, use the arrow keys on your keyboard to make small incremental changes. This works well for fine-tuning adjustments.
3. Insert numerical values with your keypad manually in the appropriate box. This works well if you have a particular numerical value in mind, but is rarely used.
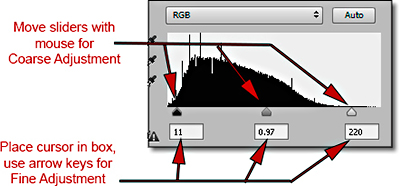
This example is from a Levels Adjustment Layer:
~ To move quickly between numerical fields, you can use the “Tab” key or the “Shift + Tab” Keys.
~ In certain adjustments, particularly in Adobe Camera RAW (ACR): To quickly return a value to its default or “zero” value, double-click on the “triangle-shaped” Slider for that value.
The Cursor:
Don’t like the Mouse Cursor Shape as it shows up in your image? Can’t seem to find your cursor? Or you keep clicking in the image, and something happens that you don’t expect?
Simply change the Tool in your Tools Panel to something less likely to give you a weird result if you click accidentally in your image. I like the Hand Tool (Speed Key “H”) and the Move Tool (Speed Key “V”). They’re both easy to see in your image.
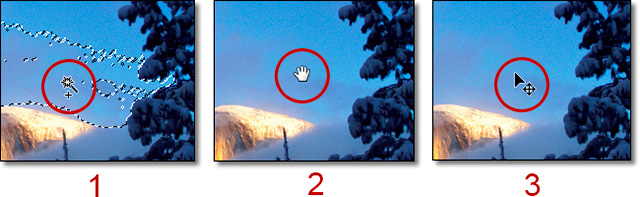
In Image 1: The active tool is the Magic Wand Tool represented by the icon circled in red. It’s fairly easy to see, but if you accidentally click in your image with it active, you’ll be making an unwanted selection.
In Image 2:The active tool is the Hand Tool. It’s very easy to see, and very hard to mess up your image, as it’s just a navigation tool.
In Image 3: The active tool is the Move Tool. It’s also easy to see, and, unless you’re into heavy-duty graphics not covered in these tutorial, it’s also very hard to mess up your image.
Until the next column, have fun and stay well!
by John Watts, Watts Digital Imaging
All text & photos / screen shots: © 2014 John Watts, Watts Digital Imaging. All rights reserved.
Leave a Reply