

As the winter season starts to wind down for another year, there is still time to go out and capture some nice winter landscape images. Let’s look at the various options available when photographing snow for obtaining those great snow scenes.
Histograms & Exposure
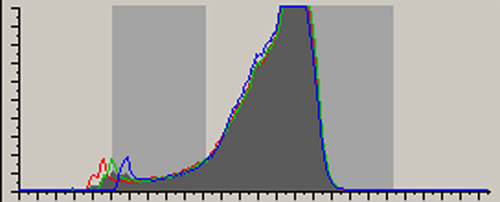
Are you a slave of the histogram when you’re capturing your photo images? There is one subject that is sure to change your dependency on wanting the majority of the exposure in the middle section of the bell curve– snow.
Relying on keeping the exposure in the middle when photographing snow will result in a grey toned scene as the camera’s meter tries to make the scene, and specifically the snow, neutral colored with an overall muted cast to it.
All above photos: © Andy Long. All rights reserved.
Even if the histogram is centered while shooting snow, don’t be dismayed, there’s a chance of recovering the photo post production with the use of levels or curves in Photoshop.
But remember, while doing some tweaking of an image post production is fine, it’s always best to try and get the optimal results when you’re out in the field. For snow landscapes, this might mean doing several shots of each composition and doing some bracketing to see which one results in the right desired effect.
More than likely, the one you choose will probably be an image where you used plus compensation–overexposure.
EXAMPLES:
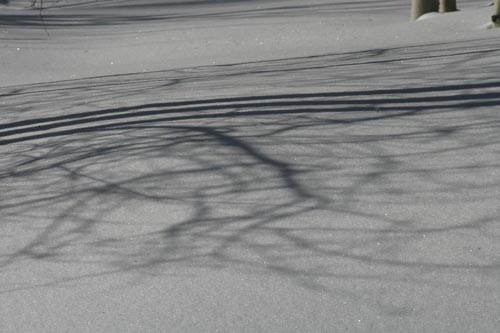
Example 1: This histogram shows the majority of the pixels slightly to the right. As the unprocessed image shows, the whites are a bit dingy and don’t really show off the white they truly are with the amount of snow that is present.
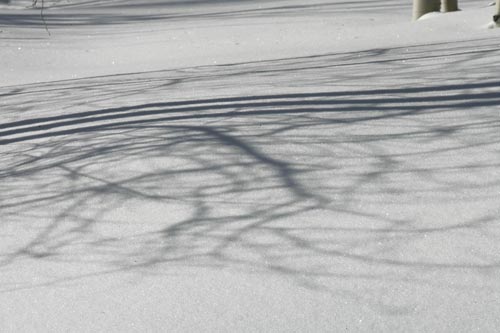
Example 2: This is same scene with +2/3 exposure compensation and you can see the whites becoming closer to being white.
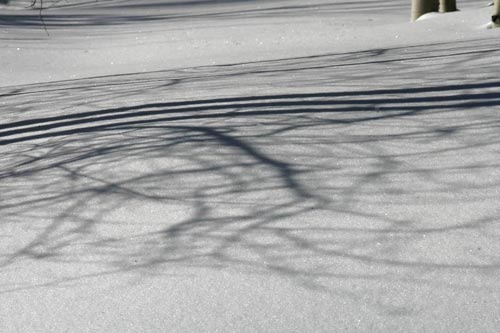
Example 3: This is the first grayish image in which I used Photoshop Levels to enhance the shadows and the whites, showing that a shot that isn’t quite right can be corrected post production.
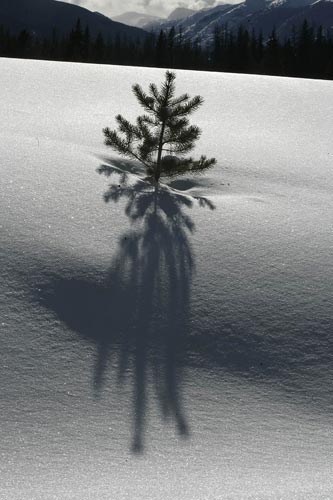
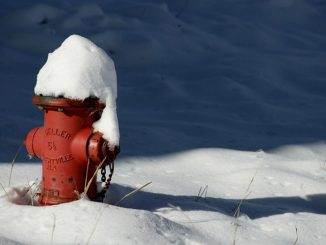
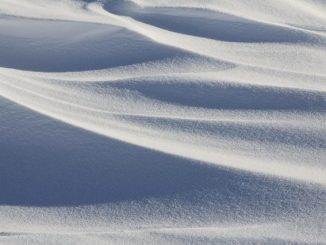
While perfect white snow makes everything pop, especially with the contrast of a beautiful blue sky, there might be times when a little underexposure needs to be used to enhance the glistening of the snow on a tighter scene, such as with the photo below/left. The original was shot at -1 EV.
In this vast field of snow, the underexposure also brought out some of the shadows and shapes in the ground’s folds and curves surrounding the small pine. By having the correct camera settings in the field, there was no need for any post production work.
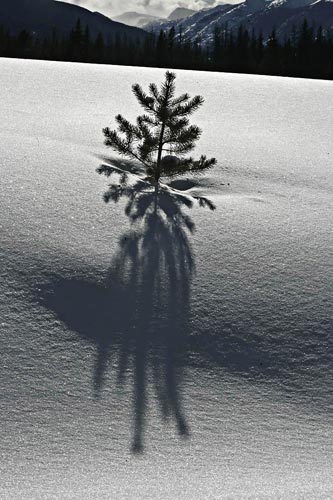
But let’s say you would like to give an image even more of a contrast pop to bring out this glistening effect in your photo. The Photoshop High Pass Filter can be used.
1. Create a duplicate of your background layer by selecting Layer Menu -> Duplicate Layer ->O.K. (the new layer is labeled Background Copy). You can also use the shortcut keys–Ctrl + J in Windows and Command + J in Mac (the new layer is labeled Layer 1). This layer will appear above the original Background layer in the Layers Palette.
2. Be sure you your new layer is selected/highlighted and go to the Layer Blend Mode option in the top left corner of the Layers Palette (small drop down box with Normal in it). Click on the small down-pointing arrow on the right and select Overlay from the Layer Blend Modes list. You will immediately see your image with a lot of contrast.
3. Go to Filter -> Other -> High Pass and move the slider until you reach the desired effect. Here, the snow glistens more and there is now more contrast in the overall shot.
© Andy Long. All rights reserved.
Original: Shot at -1 EV
© Andy Long. All rights reserved.
Photoshop High Pass Filter used
© Andy Long. All rights reserved.
Photographing Snow – Adding Snap
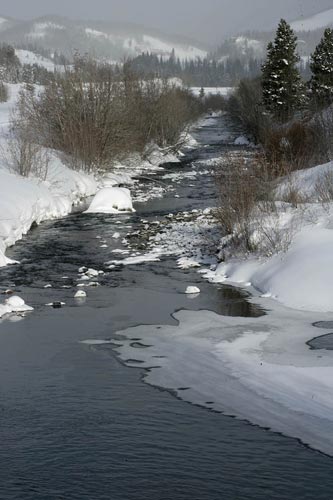
There are also other occasions when underexposing just a tiny amount can add more snap to a shot. A good example of this is when some low clouds or fog is present.
By underexposing just -1.3 EV, such as in the foggy scene on the left, it brings your attention to the fog while still maintaining the white of the snow. Using Evaluative Metering for this shot helped balance out the white of the snow with the dark shades of the trees, shrubs and water.
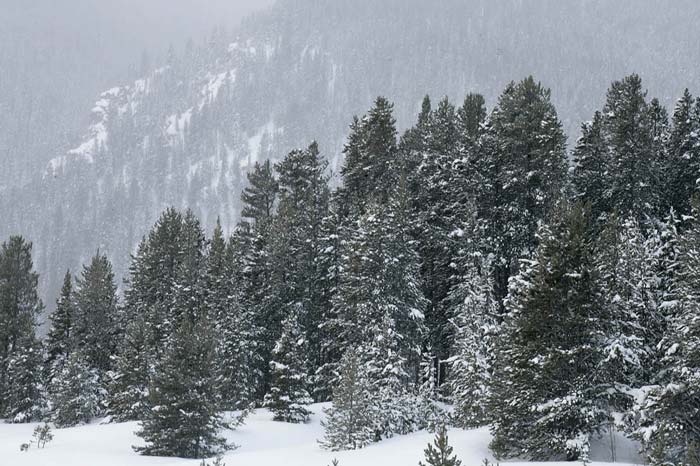
Fog not only adds mood to an overall scene, but it can also help separate parts of a scene.
The hillside covered in pines below shows a distinct forward group of trees while those on the hillside in the background are shrouded in fog. It allows the viewer to first concentrate on the foreground subjects before their eyes are pulled to the back of the image and ultimately to the image as a whole.
© 2010 Andy Long All rights reserved.
Create Black and White Images
Since most of your winter snow scenes contain a lot of white with darker contrasting subjects, creating a black and white image in post production Photoshop can provide you with very nice results.
The newest versions of Photoshop make this technique very easy. Once an image is open, you just click a button. In the Adjustment Panel, there is an icon on the second row (fourth from the left ![]() ) that is designed for taking out all the color and making the image black and white.
) that is designed for taking out all the color and making the image black and white.
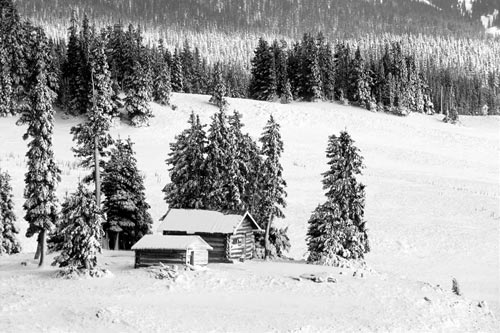
After selecting this, a series of color sliders will appear and these can then be used to darken or lighten any colors that appeared in the colored version of the image. For instance: if you want to darken the trees in an image, as I did in the photo with the cabin, just pick green and move the slider to the left.
Note: In older versions of Photoshop the easiest way to create a black and white is by going to Image > Adjustments > Desaturate.
Conversely, if there’s an object in a snow image that could use a little bit of pop brought to it, adding a fair amount of saturation can enhance the object.
EXAMPLES:
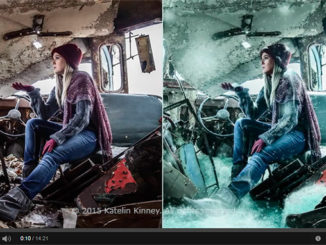
Example 1: The image as originally used.
Example 2: I enhanced the saturation of just the Red Channel to 65 to pop the red in the scene substantially. If the Master Channel had been used, the color of the sky and ground would have also been adjusted, giving a different cast to the overall image. (This example is oversaturated just to show what the effect can do.)

© Andy Long. All rights reserved.
Original
© Andy Long. All rights reserved.
Red Channel with over saturation
Composition
While it might be nice to capture the feel of an entire area, isolating bits and pieces can bring out the beauty and subtle details. To accentuate the contrast that snow provides, coming in tight on a section of a subject covered with snow can bring out both contrast and an element of interesting patterns.
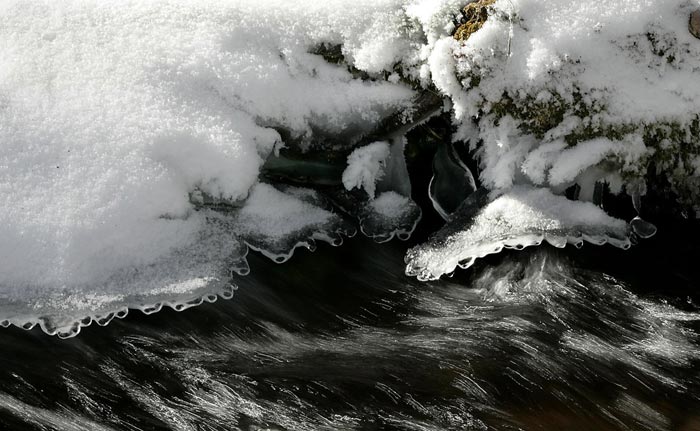
If the opportunity arises to work with a combination of snow, water and ice, you can create an attention-grabbing image. Coming in tight on just a small area which shows the details is very appealing, but it can also be a setting than can prove to be tough to capture because of the possibility of extreme contrasts.
Try taking the shot without any exposure compensation in order to pull in all the values as evenly as possible. You can then do little bit of Photoshop dodging and burning post production. Even though you may get a few dark spots in the image, be sure there is still be enough detail around them that they are not overpowering.
© Andy Long. All rights reserved.
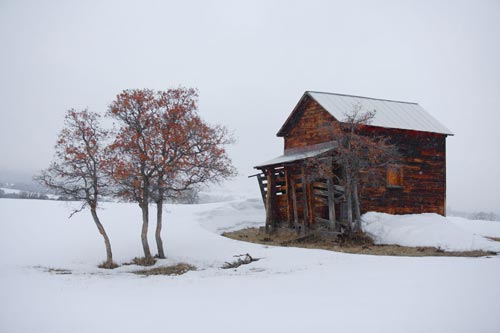
Depending on where you live or visit, seasons can overlap and you can get a mix of fall and winter on the same day (see lead photo). Fall colors and snow are very common in most northern and western destinations, so try to take advantage of this during the next fall season.
Getting just a portion of the overall scene to bring out this contrast can show exactly how the seasons work together and can result in some stunning shots.
When photographing snow, keep your eyes open for overall scenes or for a part of the whole to show how everything works together. And don’t forget to let the weather work to your advantage. Whether it’s a foggy day, the snow is falling or there’s a crisp blue sky, the conditions are always right to be able to do something when there’s snow on the ground.
by Andy Long
Leave a Reply