
© 2009 Randy Romano All rights reserved.
Photographing the interiors of buildings and homes can be a daunting and difficult task, but if you’ve done your homework and are prepared, you’ll accomplish your goal of capturing great images and have very happy clientele.
Good lighting techniques are a necessity in order to best capture the important features of the home. The main dilemma is attaining a good balance of the light between natural or available light, strobes and interior tungsten lights. Mastering this delicate balance is the difference between images that are standard with those that are extraordinary. Of course equipment is important in obtaining this good balance, but it is the photographer’s eye and ability to make the lighting work well that is of ultimate importance.
An Initial Walk Thru
If possible, set an appointment just to observe the interior structure, its lighting and its contents. If you need props to make the home appear active with occupants, you’ll now know what you need to bring with you. Take notes and just some quick images for reference, so you’ll be more prepared for when you return to do the actual shoot.
The initial walk thru of an interior space must include both an awareness of light and the room’s important characteristics or features. It is easy to be overwhelmed by the size or beauty of a building, so you must force yourself to slow down and access every detail with care. Take some deep breaths and look at the rooms from a vocational point of view.
First, the photographer should pay close attention to how the natural light is falling in all the interior rooms that will be photographed. Of all the points in interior photography, this is the most important. The addition of artificial light should only be carried out after accessing the amount of natural light with which you have to work. The addition of strobes should be complementary to natural light and not the other way around.
Second, you should find the best angles of the room, to highlight and emphasize its best characteristics.
The Details
Be sure you master all of your camera’s controls before doing this type of assignment, as you may be working within a limited time frame. You may want to practice the various techniques within your own home or the homes of family and friends until you become more confident and proficient. And experimentation will be one of the keys to your success, as each room is different in its available light.
Composition
1. Take your time to make careful compositions. Be diligent about observing all of the furniture and elements within the room and eliminate any unwanted items that might be distracting. For example: Remove sponges, towels and other household cleaning items from within the kitchen. (I have made this mistake many times in the past, having had to spend a longer time in Photoshop removing these items.)
© 2009 Randy Romano All rights reserved.
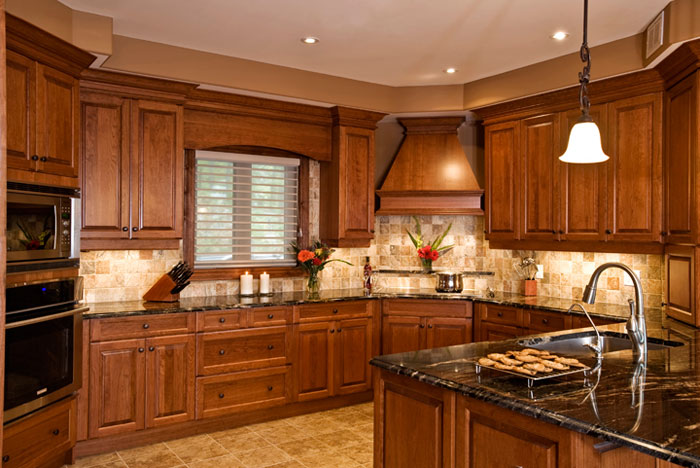
2. On the flip side of the coin – if you don’t have stylists or room stagers working for you, make sure you add some props to each room. The goal is to make it look like the home is occupied – like someone just left a room. For example: If you’re photographing a kitchen, place some colorful bowls of fruit and/or half-filled wine glasses on the counter or table. Maybe consider placing an open book with a pair of glasses on top of a side table near a lamp and chair. Fresh flowers that are well placed also add a great accent to most any room (no limp, brown edged flowers here).
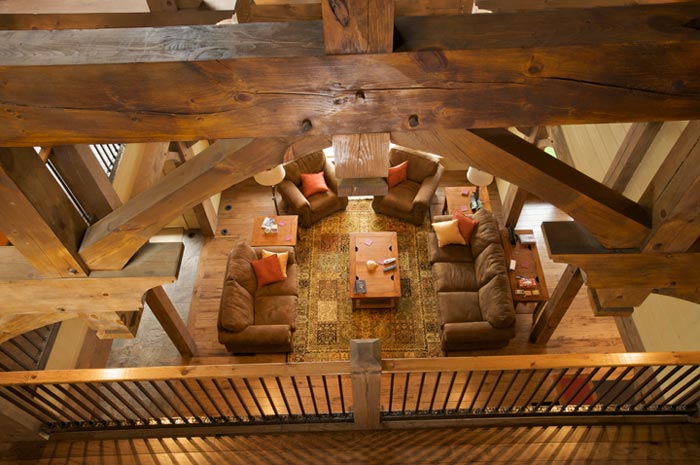
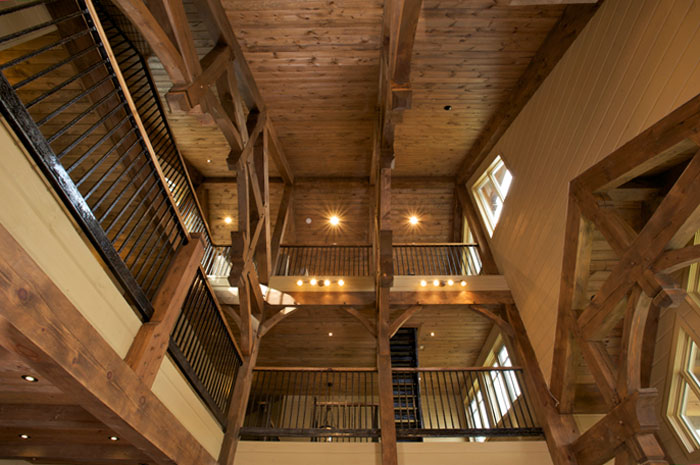
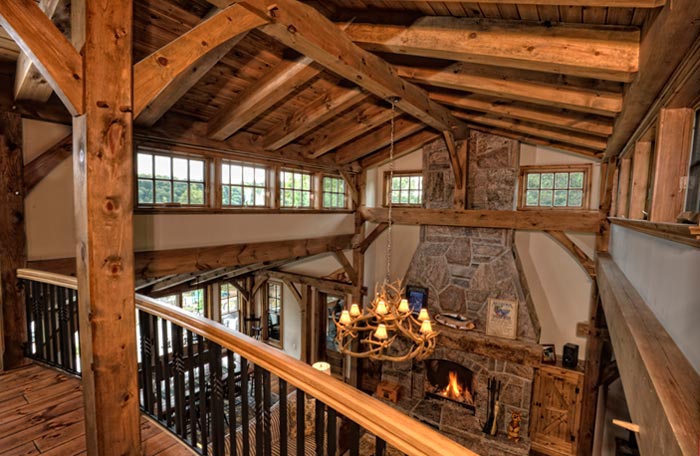
3. Along with making overall images of a room, look for smaller vignettes of some of the important architectural aspects. Make sure to do this with your clients in mind. For example: If you are photographing for a builder or an architect, be sure to include some of the important building characteristics, such as timber frame wood beams.
4. Make sure you access and use your creativity to find different and unusual angles in the rooms. If you can, take the time to play. I enjoy getting lower or higher perspectives of rooms when possible. Try to explore with your camera how the room looks from a variety of angles.
© 2009 Randy Romano All rights reserved.
5. For a longer exposure in darker rooms, try firing off the strobes two or three times per exposure. This has the effect of emphasizing important aspects of the room and generally brightens things up. Try and experiment with this technique, as it can work in some circumstances and be too bright in others. Remember: Soft and not over powering light is the best.
6. Try grouping your strobes together and shooting through a light panel. In this way you’ll get a big source of light that is really well diffused. Sometimes you can bounce your strobes off umbrellas before making the light pass through a large light panel. This really helps to make the light soft and allows the light to wrap around the room’s furniture.
© 2009 Randy Romano All rights reserved.
7. Use your lighting to work in your favor. Diffusers, grids, black and white cloths, spot grids, barn doors, filters and snoots can be used to shape the light and control it. Check into the variety of modifiers available for your lights. Note: Some of these can be made very inexpensively.
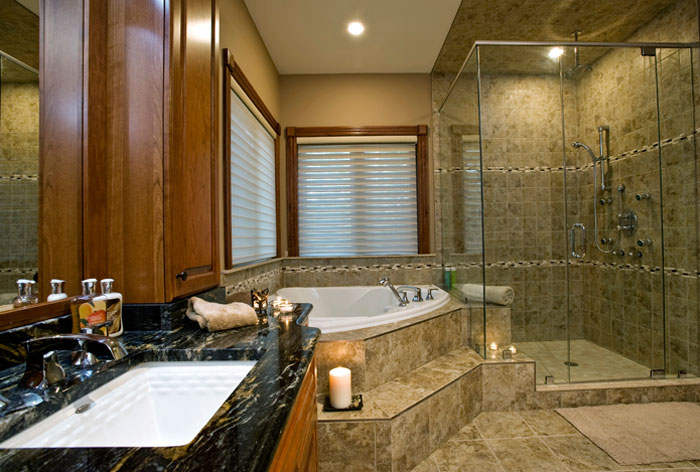
8. Use the floor as a good place to bounce lights, but once again, it is dependent on the floor’s color and texture. I find this works really well in small rooms like bathrooms, which can prove to be really difficult to light – get a good balance between the strobes and tungsten lighting.
© 2009 Randy Romano All rights reserved.
9. Never use straight flash, not only because it is too bright and obvious, but it also means you are not working creatively. Over lighting an interior space is simply boring and very predictable.
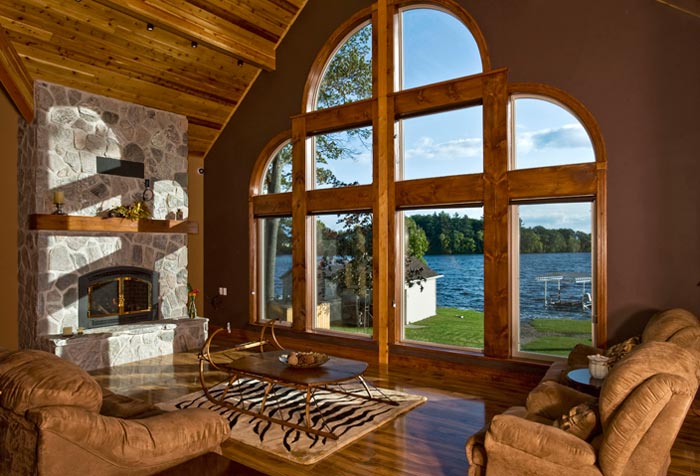
10. Make HDR images, especially when photographing into windows which have a spectacular view. Using HDR can help make proper exposures where there are 5 f-stop differences between outside and inside light. Getting this exposure right is essential in order to showcase the outside landscape that many buildings and large windows emphasize. Not only are they useful, but add to the fun aspect and creativity factor.
© 2009 Randy Romano All rights reserved.
11. Experiment with firing your strobes for each of the five HDR exposures – try it with only 3 out of the 5 images. Experiment to see which technique produces the best results.
Take It Outside
Plan for and work towards night/dusk shots of the building exterior. This enters into your interior shoots because you need to plan to get outside at the right time. So as you are working through your interior rooms keep track of the time and plan to move outside to get these essential images. Dusk exterior images, are paramount in creating a well-rounded architectural portfolio.
To learn more about photographing the exterior of homes, visit the previous article:
Interior photography can be extremely challenging and all encompassing. However, if you show excitement and enthusiasm with your subjects, your love and passion for this craft will show through in your photography.
As always I would love to discuss any aspects of interior photography. Feel free to drop me a line at randyr@turtlepondphoto.com
by Randy Romano
Beautiful Designs! I actually love this article a lot. I really love the design of the Living room and Kitchen. Pictures are very attractive and very impressive. I really loved reading your blog. I am planning to renovate my house next year and will definitely try some of these ideas for my house. I will bookmark this page right now. Thank you so much for sharing this great blog. Do keep posting.