You have accumulated all your essential photography tools, so now it’s time to find that perfect camera pack in order to carry your camera equipment into the field. The second product review in the series, The Photographer’s Toolkit, looks at an inventive solution to stowing your precious gear.
Living here in Florida where it’s hot and humid creates challenges when it comes to carrying camera equipment. Carry a pack that covers a large portion of your back over a long period time and you will have a perspiration soaked shirt and you’re going to feel the heat even more. Carry a large shoulder bag and you’ll feel the weight of it on your shoulder. If you set your pack on the ground, on the sand at the beach, or a dock to retrieve an item, then you need to keep an eye on it – little crawly creatures will be happy to get inside and go for a ride!
Every photographer has special needs for carrying their gear. I’ve used a number of styles depending on how much gear I planned on taking for a particular outing, so therefore, I’m always moving my equipment from bag to bag.
Enter the Think Tank Photo Camera Belt and Modular Rotating Component Systems.
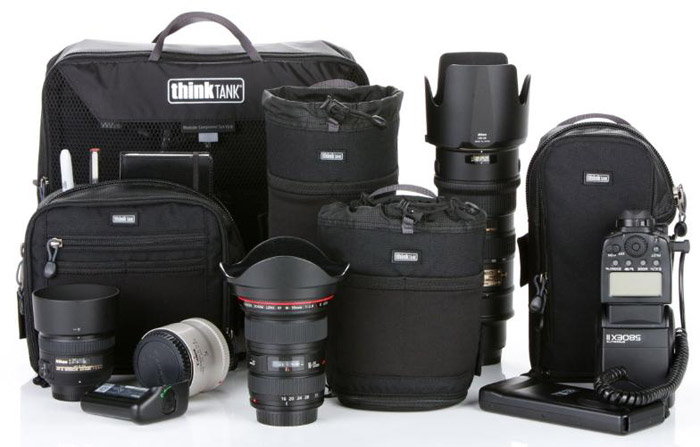
First of all, just the name Think Tank Photo gives you a hint about how this company functions and how they go about creating their packs. Go to their website and read about the Think Tank Photo team and you’ll understand that it’s all about producing innovative carrying solutions. Yes, they make great backpacks and sling packs, but the belt and rotating component systems is an unusual means of carrying ones equipment, so I wanted to explore it further.
I chose to have Think Tank Photo send me the Camera Belt with a variety of Modular Rotating Components. It looked like a great solution to packs that end in disarray. I liked the concept of its flexibility and practicality-being able to add or remove the various pouches depending on what was needed during a particular photography excursion.
OUT OF THE BOX
The Belt
There are three belts from which to choose and all of the pouches are interchangeable on all of the belts.
Thin Skin: It’s lightweight with no padding.
Pro Speed: 5/8” padding with rounded edges.
Steroid Speed: It’s an extra wide padded belt for more support and comfort while carrying heavier lenses. It also has fastening points on which you can attach a harnesses or shoulder strap so you can transfer more of the weight to your shoulder/s.
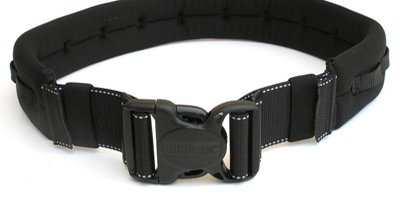
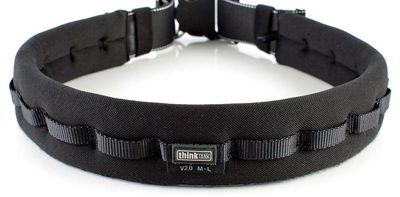
I choose the Pro Speed Belt.
The belt itself is constructed of nylon webbing with a large, strong buckle and buckle stops that prevent the belt from loosening after you have easily adjusted its length. Should you need to resize the belt, it is also relatively easy.
The padded portion of the belt utilizes high-density closed cell foam covered with mesh, and when combined, it creates a very flexible and comfortable 5/8 inches of padding.
On the outer side of the padding is nylon webbing which is stitched heavily and vertically to form loops for the modular components. You can choose to utilize these loops so your components remain in “locked” positions on the belt or you can attach the various pouches so they are free to “rotate”/push and pull around the belt.
It comes in two sizes (Small – Medium and Medium – Large) and weighs in at 7 and 8 oz. respectively. Be sure to consider how you’re going to be wearing the belt – at the waist or lower on the hips. When deciding on the size, consider those times when you’ll be wearing it over heavier clothing.
The Modular Components: Lens Pouches & Pouches
I carried my gear with these pouches, but there are many more:
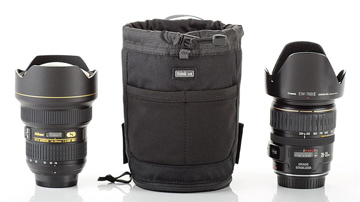
Lens Changer 15 V 2.0 and Lens Changer 25 V 2.0: extra lenses with lens hood attached or reversed and small items in the front pockets
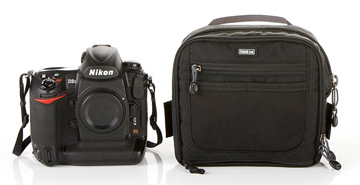
Speed Changer V 2.0: can handle a pro-sized camera body without lens attached and/or smaller lenses, teleconverters, exposure meter, filters and other accessories
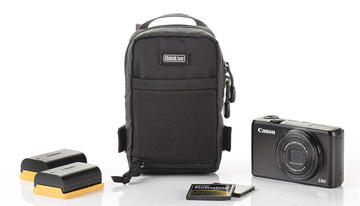
Little Stuff It: smaller accessories, such as extra batteries and a cell phone
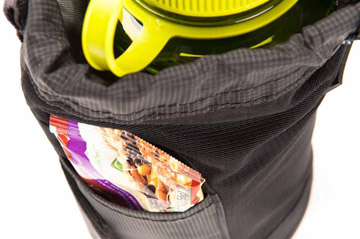
RU Hot: full-sized water pouch and/or snacks, hat, gloves, sunscreen or bug spray
Just load them up any which way you like.
Note: Since all of the pouches are made with the same quality construction and attention to details, their attributes and individual features are combined.
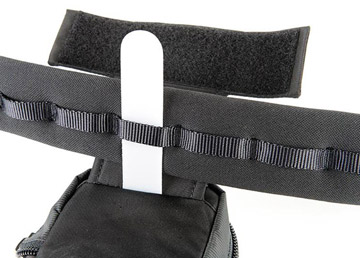
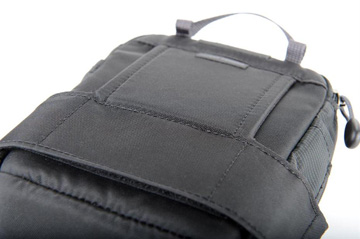
1.) They come with instructions, but my guess is you will already know how to load them on the belt after researching the products on their website or by viewing one of the various instructional videos. The system is so simple in design, that you can’t go wrong.
2.) On initial inspection of the basic construction one can’t help but be impressed. They use quality, durable water repellent fabrics and heavy stitching.
3.) Each is made to either “lock” on the belt with a plastic tongue that is inserted into one of the belt loops and then secured around the belt with a back flap that utilizes strong Velcro near the bottom and sides of the pouch. If you choose to “rotate” the pouches, you just skip inserting the plastic tongue into the loop.
Note on security: I pulled and tugged on a pouch from its sides, the bottom and the top to try to physically remove it from the belt, but I couldn’t do it. That makes one feel very certain that a would-be thief will not be attempting to remove a pouch.
4.) All have built-in, mid-weight padding, so your gear is protected if you bump into something or possibly drop your loaded belt.
5.) Each has a grab handle on the upper back side and small attached loops in case you just want to take one bag and convert it to a shoulder bag by attaching their Keep It Up Shoulder Strap.
6.) On the front of each pouch are handy stretch pockets so you can just slide in your lens cap or other small accessories.
7.) The pouches have a removable, seam-sealed rain cover. Just unzip the bottom zipper, pull it out and cover the pouch. Each one is made to fit the size of the pouch and is secured to the pouch with a strap within its compartment. They can be removed for cleaning and drying and then just hooked back on to the loop, folded up and stored away until the next storm.
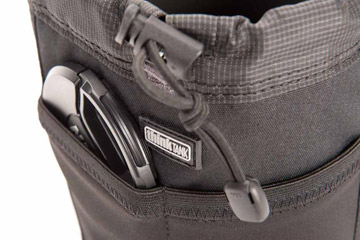
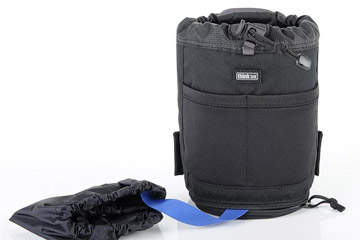
The Lens Changers
These lens pouches are so convenient and roomy, while providing great padded storage for your individual lenses and lens hoods. There are a variety of Lens Changer sizes. Be sure to check the width and length of your lens (with hood on or reversed) to find the correct size.
Additional features beyond the above pouch attributes (includes RU Hot pouch):
1.) The pouches have a wide-mouth feature, so it’s quick and easy to get a good one-handed hold on the lens.
2.) Opening and closing the pouches is a convenient one-handed operation. To open, just squeeze the drawstring closure and pull. To close, just pull on the drawstring. Very easy!
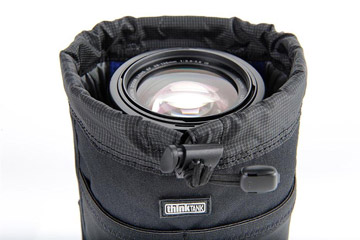
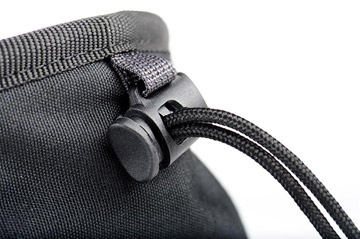
3.) They have a self-contained, internal dust flap that covers the top of your lens. Just flip it up, slide your lens inside, flip it down and close it up.
Note on security: Since they are so easy to open and close, I had some concerns over someone else being able to easily open a pouch and take the lens for themselves. However, when I had a friend try to do so, I certainly felt the tugging on the belt and could hear when it was opened, so I think this might be possible only if you’re in a very crowded/tight area.
The Speed Changer
What a fitting name for this very versatile pouch. It measures 8″ W x 7″ H x 4.5″ D and can also be used independently with a shoulder strap or even flipped over a regular belt. It’s a well organized pouch with two outside stretch pockets for lens caps or other small items, followed by a thin zippered compartment that could be used for note pads, model and property releases, and then a larger zippered compartment perfect for you camera manual, pens, extra memory cards, remote shutter release or other small items. The main compartment of the pouch has three removable dividers, so there is great flexibility in what can be loaded inside.
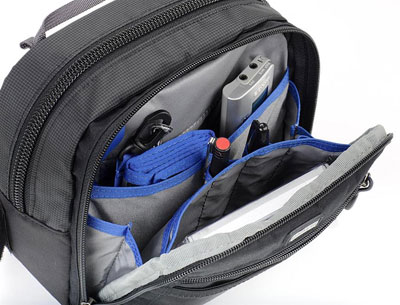
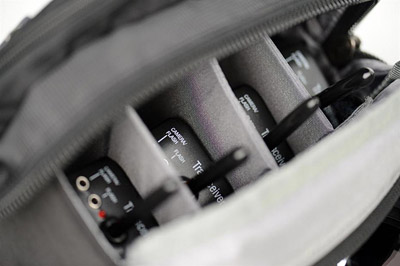
Additional features:
Along with the same quality fabrics, it is made with abrasion resistant, fused zippers that can be opened and closed easily with one hand by just grabbing the attached cording and plastic tap.
In the Field
Getting prepared: I loaded the pouches ahead of time and balanced them around the belt to distribute the weight as evenly as possible – another benefit to this modular system. I actually chose to keep them in “locked” positions when carrying all five pouches, since there was little room remaining on the belt for “rotation”. However, since I will be wearing the belt at the hips, it was very easy to just lift the entire belt system and rotate it around if I needed to get to something on the back side of the belt. Play with it and find what works best for you.
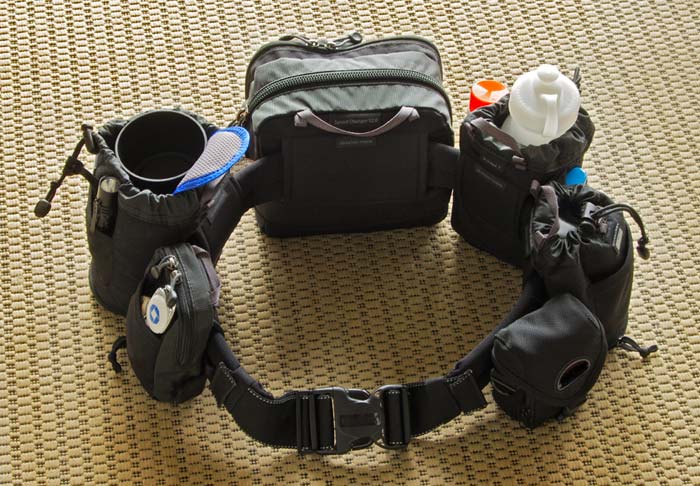
© 2012 Marla Meier. All Rights Reserved.
My Belt Loaded with Lenses & Accessories
I already had a small pouch for my screw in filters and it hooked right onto a belt loop with ease.
I spent a weekend photographing on Jekyll Island, Georgia. There was a variety of terrain – sandy beaches and dunes, boardwalks with stairs, and wooded areas. It was going to be hot during the day, hovering around 90 degrees. And, they forecasted rain.
When I arrived, I headed straight to the northwest tip of the island, strapped on the fully loaded belt, grabbed my tripod and walked out to an area of the beach that is littered with driftwood. I did notice that the pouches prevent you from walking normally with your arms at your sides, so if hiking some distance this might be bothersome.
What an amazing experience working with this belt system! If I needed to change lenses or filters or reach any item, they were at my fingertips or reached by merely rotating the entire belt around to the pouch that I needed. Everything was super convenient! I was bending, crouching on one knee, and squatting many times during this venture. Not once did this system get in my way. And, not once did one of the pouches touch the ground – no sand on or in any of them.
I was focused on making images, so it wasn’t until I returned to the car hours later, that I noticed that the weight of the belt was not noticed! No back pain and no shoulder pain! So was it comfortable and cooler than my other packs? Since I didn’t pay attention until my return, the answer is a resounding yes!
I went to the historic district in the afternoon. Just lift up the belt, strap it on and you’re ready to go. Once again I was focused on my photography. It started to sprinkle and very quickly it was followed by pouring rain. There wasn’t time to get all the rain covers on the pouches, and since the belt has no cover, it got wet. I must admit that my rain poncho was much faster in covering everything quickly. So if you think it’s going to rain, you would have to cover the pouches in advance and lose that quick access to your items. This isn’t much of a down side to the belt system, since I always carry a rain poncho, and I think there is a great upside – use them to prevent blowing sand or dust from getting inside the pouches or use the spaces where the rain covers are stored for filters or other small items.
The following morning, I headed out to the dunes near my hotel. Since my equipment was close at hand, I chose to carry only two of the five pouches. This time I attached them so they could “rotate” on the belt. They moved forward and back on the belt quite smoothly whenever I needed an item.
Additional notes on security: Now, if one is traveling by public transportation, such as planes, buses or trains, I would probably put the entire system out of sight in one of their larger bags or packs. This would also make it easier to transport.
This belt does announce that you are a photographer and have a lot of photo gear with you. It drew a lot of eyes on me, but I’ve also had eyes on me when I was just carrying my camera, a tripod and other packs. And since I never had to take the belt off, I knew they would have to try to steal me too!
BOTTOM LINE
The Think Tank Photo Pro Speed Belt and Modular Rotating Component System was definitely a good choice. It does everything they say it will do with just a couple of minor inconveniences. It’s practical, secure and very flexible. It’s also easy to organize and keep organized and makes it very easy to quickly grab whatever equipment or accessory you need. It’s extremely comfortable and very cool when photographing in hot climates. You have an incredible amount of freedom to move about easily while photographing without a need to ever remove the system.
I’m amazed by this system and would think it would fit most any photographer’s venue, whether you’re an event, sports, or nature photographer, professional or amateur, or weekend photography lover.
Be sure to check the Think Tank Photo website and
find the carrying system and accessories that will work best for you.
by Marla Meier, APM Editor
Review: © 2012 Marla Meier. All Rights Reserved.
Photos provided by Think Tank Photo.



Leave a Reply