
When I was just starting in photography, I attended a conference or a workshop where Jay Maisel, an outstanding New York photographer and teacher, was speaking. I remember he came out with a camera on his shoulder and he asked us if we wanted to know the real secret to taking great photographs. Naturally, this grabbed our attention and I certainly sat up a little straighter and waited breathlessly to hear what the big secret was. He tugged on his camera and said, “Carry this with you all of the time!”
I remember being a little deflated with that answer, but thought he made a good point in a very effective way. How in the world could I expect to make great photographs if I didn’t carry the camera? But of greater importance was learning what to do with the camera when I came upon interesting or exciting subjects to photograph.
To make super photos, you have to practice, practice, and practice some more. I wondered what the next step was and how I needed to go about making sure that the practice wasn’t just a matter of pushing a button and repeating the same step over and over again. Of course I had to know how my camera worked technically, but beyond that, I wanted my practice specifically directed toward my personal goal of showing the beauty of nature in ways that most people hadn’t ever seen it. That was a gigantic goal, but certainly one worth trying to pursue.
So yes, the biggest secret of all is to carry the camera with you. You can’t create beautiful images without it. But to take you beyond having your camera hanging on your shoulder, I’ll get you started with a few more photo secrets that you might try. These should help to make your practice time a step toward your personal success.

STOP, LOOK, LISTEN!
Stop rushing around. When something attracts your attention, don’t just pop one image and then walk on. Take the moment to explore your subject and area. Look around you and really see what is there. Think about what you want to include in your image, change positions or angles, eliminate excess. Listen to your own sense of good judgment. We all have moments when we take a shot and say, “Ah! That feels just perfect!” What we really are saying is that it matches our inner idea of harmony, composition and structure. Developing your sense of “good judgment” comes from good seeing – many hours of trying different ways to perfect your vision.
DEVELOP A PRACTICE AGENDA
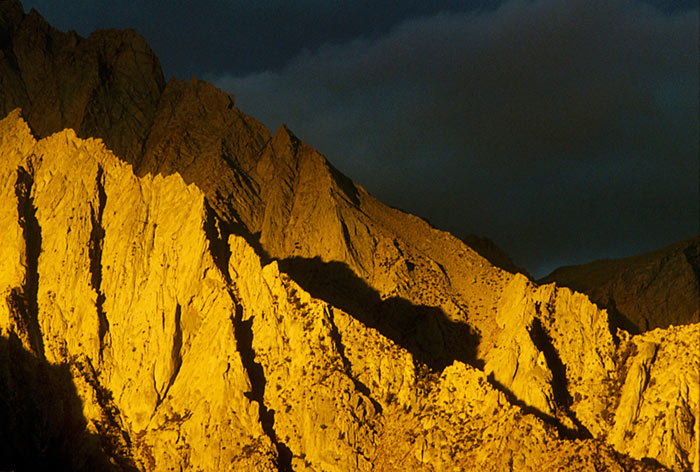
First, learn to critically look at many images. The internet, magazines and books are my primary source. I try to understand what the photographer saw, what they did do with the subject and what they did to get your attention. For example, look at the light direction, shadows and details. Look at the depth of field and lens selection. You may have to guess at what they did, but just thinking about it in this way helps you make decisions when you have your camera in hand.
Then, spend hours looking at your own work. Try to figure out what was good about it, what didn’t work and what should have been changed. I rarely delete an image in the camera because I want to study those when I return home. They are probably more important than the good ones because I have found that something you struggle to achieve can be the most wonderful teacher.
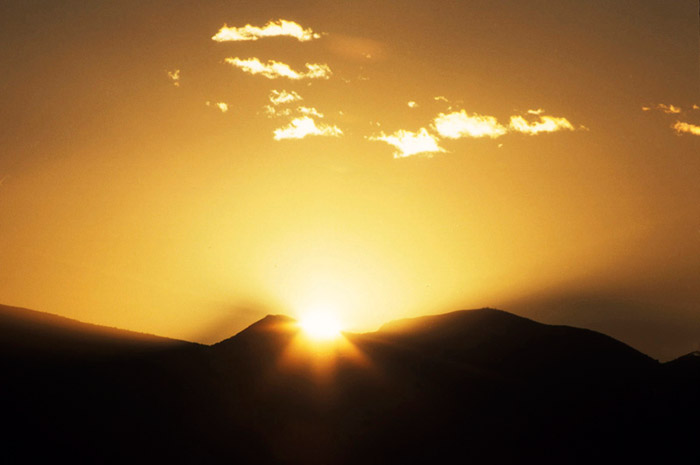
Plan a session with a single specific plan. For example, decide in advance that for the next hour you are only going to shoot subjects that are red, or perhaps you will only shoot with a wide angle lens, or photograph nothing but subjects that are backlit. By limiting yourself to one concept or idea, you force a level of concentration that brings about better photographic vision.
Ask yourself the questions that you might be asked if you were teaching someone else. Playing both teacher and student by writing down your questions and then answering them is a great way to learn and create a very personal photography notebook.
SET HIGH GOALS
Goals are very personal and need to be set carefully. They need to be set high enough to keep you moving forward and reasonable enough to achieve. I work with 2-3 goals at a time. First, I set an immediate goal for each training session. A session might include finding and photographing seven images of a red flower using different compositions for each one.
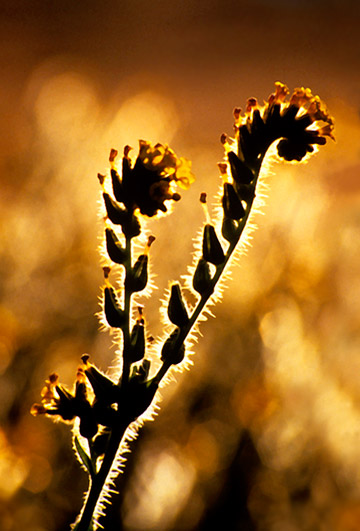
Fiddleneck – Light Study 1
Fiddlenecks are delightful small weeds that cover many roadsides and empty fields in California. They have tiny hairs covering the flower stems and leaves and the backlight shows this feature very dramatically when creating brilliant silhouettes. For even a more interesting effect, I looked for a spot where I could show this silhouette and still could blur a brilliantly lit field of gold for the background. You can highlight your subject even more effectively by being aware of the background colors and light.
Another goal might be creating and developing a portfolio of red objects. This would be a series of images that are related or share a common factor, such as combining red flowers, red umbrellas, red fire hydrants and red signs.
An even more ambitious goal would be sharing the portfolio with others online or at a camera club and asking for feedback. Asking for help is a sign of strength, not a sign of weakness. It has been my experience that many photographers are very generous in sharing their time and knowledge.
STAY POSITIVE AND PERSEVERE
Too many times, we are discouraged and take our eyes off the goal. The goal of the photographer is to continue to grow in our skills and abilities. Understanding that growth can be a bumpy road at times is part of the learning curve. Stay with your plan and your goals with a positive attitude and have fun. The best photo yet might just be the next one you take.
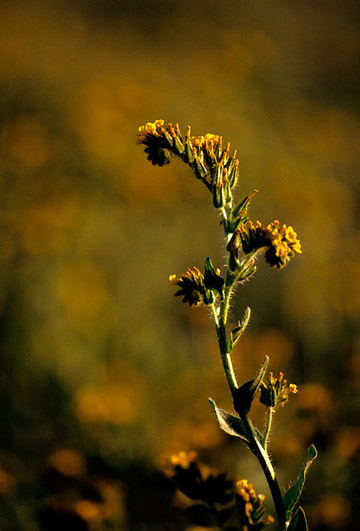
Fiddleneck – Light Study 2
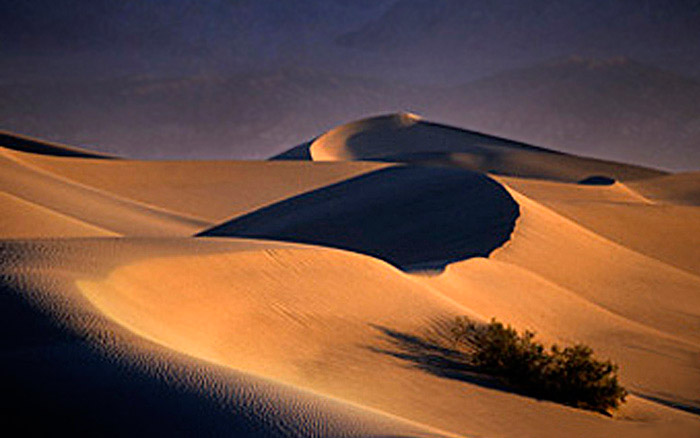
Sidelight in this shot brings out the contours and details of the Fiddleneck.
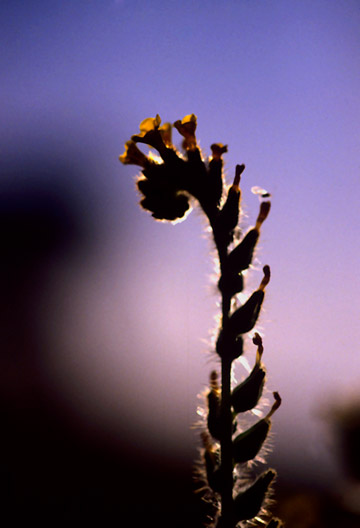
Fiddleneck – Light Study 3
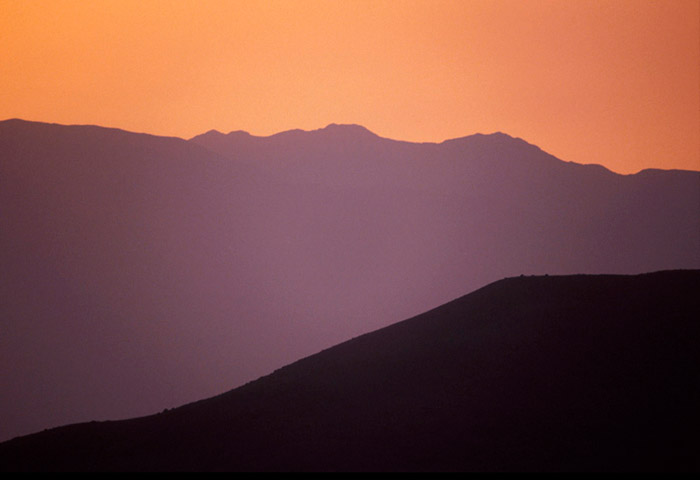
For this silhouetted effect I wanted a less dynamic background, so I used the sky and an out-of-focus bush to make the design.
So if you are wandering about one day, look for me. I’ll be the one carrying my camera and a practice plan. Will you?
by Noella Ballenger
All text and photos: © 2012 Noella Ballenger. All Rights Reserved.
Leave a Reply