
Focus stacking is a process that combines technique (shooting) and processing (software) to dramatically increase the Depth of Field (DOF) in photographic images. It is accomplished by taking multiple images of a single subject, each taken at different focal distances.
Those images are then aligned and merged together to produce a single composite image with an extended DOF. Think of HDR photography, but instead of bracketing the exposure, you will be bracketing different focal points throughout the subject.


When to Use Focus Stacking
In Macro Photography
I love macro photography. It is both challenging and exciting. For me, the most challenging part of macro photography is keeping the entire subject in focus. Focus stacking allows me to do this.
Landscape Photography
I also use Focus Stacking when I want to photograph a landscape scene that includes a very close foreground. By using Focus Stacking I can get the entire landscape in focus, and still use my optimal aperture setting of (f/8-f/16).
How to Shoot For Focus Stacking
Stationary Subject and Camera
Focus Stacking requires a subject that remains stationary. If your subject moves the multiple images won’t align correctly and the final image will fail.
The best way to ensure that your camera doesn’t move while taking multiple images is to use a sturdy tripod with a remote shutter release. While most focus stacking software may be able to align hand-held images, it’s very difficult for you to acquire accuracy during shooting and therefore, the process will require a lot more work. You’ll find that it is much more challenging, however it can be done.
When shooting for Focus Stacking, it is best to shoot in manual mode, with manual exposure and manual focus. Set the aperture between f/8 and f/16 (or your len’s “sweet spot”. Then set the shutter speed to capture the correct exposure.
If you are using a tripod, there will be no limits to how slow the shutter speed can go. If you are shooting hand-held, you will have to maintain the minimum shutter speed necessary to avoid camera shake.
Two Photographing Techniques
There are two methods used for gradually incrementing the focusing distance in order to increase the Depth of Field.
1. Moving the Camera: This method is usually done in a studio where the photographer can have more control. This method captures multiple focus points in the same image by minutely moving the camera between each shot, keeping the focusing point the same. Since only a small portion of the image will be in focus in each shot, moving the camera closer between each shot allows you to move that small portion of focus through the depth of the image so that every portion of the image will be in focus in at least one of the shots.
In order to move the camera smoothly, it will be necessary to use either focusing rails or bellows. I use the Adorama Macro Focusing, 4 Way, Fine Control, Camera Focusing Rail. It allows me to move the camera in very small increments, without disturbing the camera.
StackShot from Cognisys Inc.: “StackShot is an electronically controlled macro-rail (focusing rail), that coordinates the movement of the rail and the triggering of the camera.”
2. Refocusing: In this method, instead of moving the camera, you refocus the lens on different portions of the subject to get the entire subject in focus. This method usually involves taking three to a dozen or more images. This method allows photographers to use Focus Stacking while just using a quality camera and a sturdy tripod, and still get excellent results.
Start by focusing on the nearest point of the image that you want to be in focus. For the next shot, being as careful as possible, adjust the focus on your lens to focus a little deeper into the image, and take the shot. Keep doing this until you have captured all parts of the subject that you want to be in focus.
The depth of the subject, the magnification used and the aperture setting all go into determining how many images you need to shoot in order to make sure you have the entire subject in focus.
Regardless of which method is used (moving the camera or refocusing), the entire image is enlarged, or made smaller, depending on the direction of your focus or the direction you move the camera. As a result, all of these individual images will need to be aligned before they are merged together.
Whichever photographing technique you use, you need to make sure that the images are taken in sequence. Shoot from the back to the front, or visa-versa, but if you go out of order the software won’t be able to blend the images together properly.
There are several software programs you can use to align and merge multiple images together and the methods used by each are all very similar. Photoshop does this very well. Other programs to consider are: Helicon Focus, CombineZM, Zerene Stacker, and TuFuse.
Not only are there several different software programs to focus stack images, but there are several methods within each. In Photoshop CS5 there are several different combinations of steps to accomplish the same end result. I will describe two methods in this article, but there are several other methods, including using Photoshop Lightroom.
How to Align and Merge Images for Focus Stacking
(Note: this was achieved in Photoshop CS5, but it works the same in CS4 through CC.)
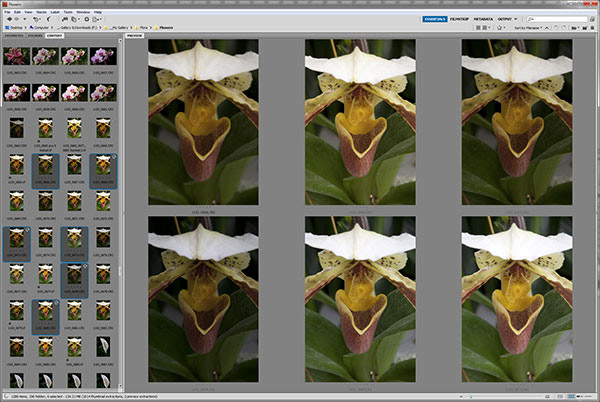
For my first example, I had taken a total of 20 images of the same orchid for merging. I used a focusing rail and started by focusing on the part of the orchid that was furthest from the camera. Then I moved the camera further and further away from the flower in about 1/16th inch increments, until I had all of the areas of the flower in focus up to the closest area from the camera.
At this point, you will have moved your camera approximately 1 ¼ inches in total from the first shot to the last shot. I did not refocus each shot as I moved the camera.
For the example below, I am only using six of the 20 images I shot to make it easier to follow along.

The next 4 partial images depict the sharp and blurry portions of the orchid from the first photo shot and the last photo shot.
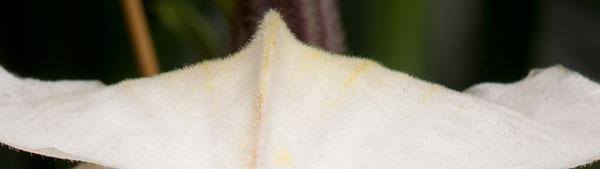
EXAMPLE 1 A
Image 0665 (first image shot): This is the portion of the orchid that was the furthest away from the camera. Notice you can see the detail on the orchid.
EXAMPLE 1 B
Image 0685 (last image shot): As I moved the camera further and further away, and focused on the areas of the flower closest to the camera, the area of the orchid that was furthest away in my first shot is no longer in focus.

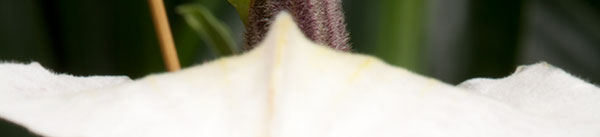
EXAMPLE 2 A
Image 0665 (first image shot): This is the portion of the orchid that was the closest to the camera in the first image. Notice that unlike the portion of the orchid in Example 1 A, this portion of the orchid is blurry.
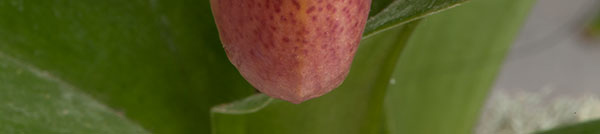
EXAMPLE 2 B
Image 0685 (last image shot): This is the portion of the orchid that was the closest to the camera in the last image. Notice that unlike the portion of the orchid in Example 1 B, this portion of the orchid is in focus.
Method One: Photomerge
1. Open Photoshop CS5 Bridge and select the images you want to use.
2. Open Tools -> Photoshop -> Photomerge
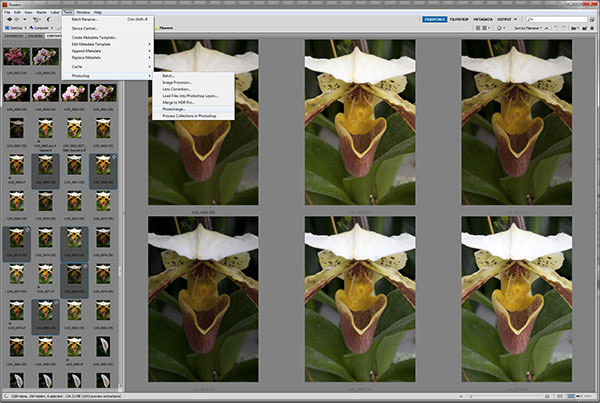
The Photomerge box will open up…
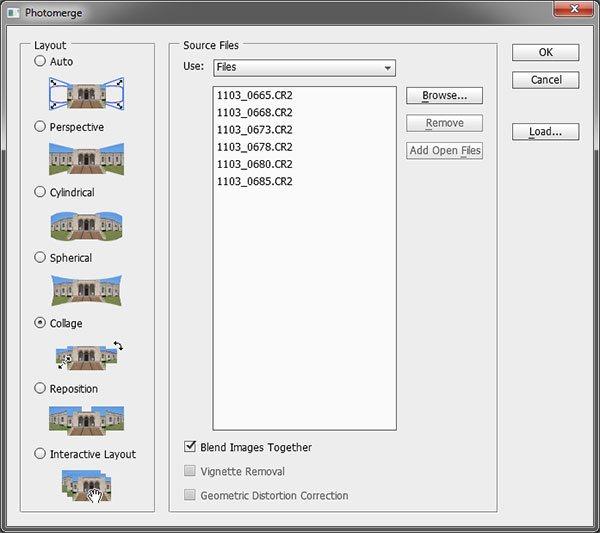
3. Select Collage (Auto will also work)
4. Unselect Blend Images Together
5. Click OK
(Left) This is how the combined images look in Photoshop CS5 at this stage.
6. Select all layers in Photoshop CS5
7. In Photoshop CS5, select
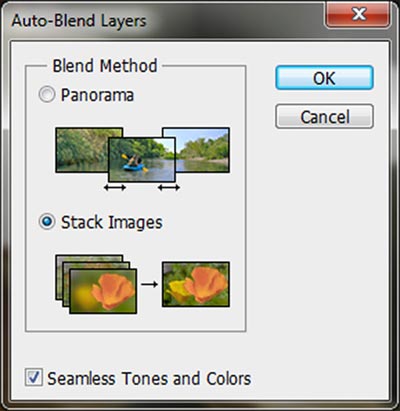
Edit -> Auto-Blend Layers
8. Keep the default settings of Stack Images and Seamless Tones and Colors & click OK.
This is what the images will look like at this stage.
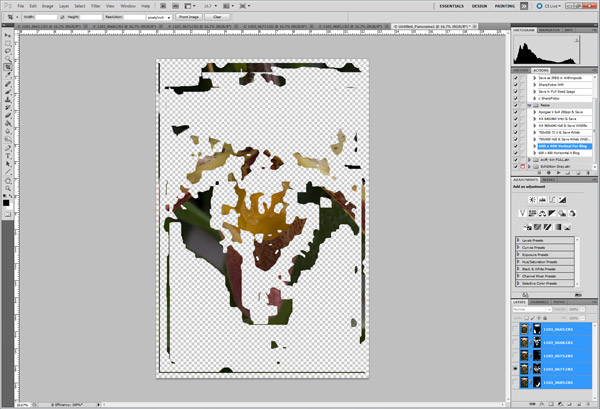
If you look at only one of the layers it will look something like this… It is because the program determines which portion of each image is in focus and only keeps that portion.
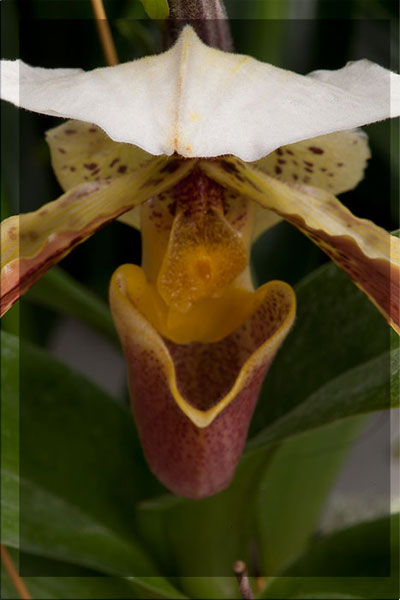
9. Now select Layer -> Flatten Image.
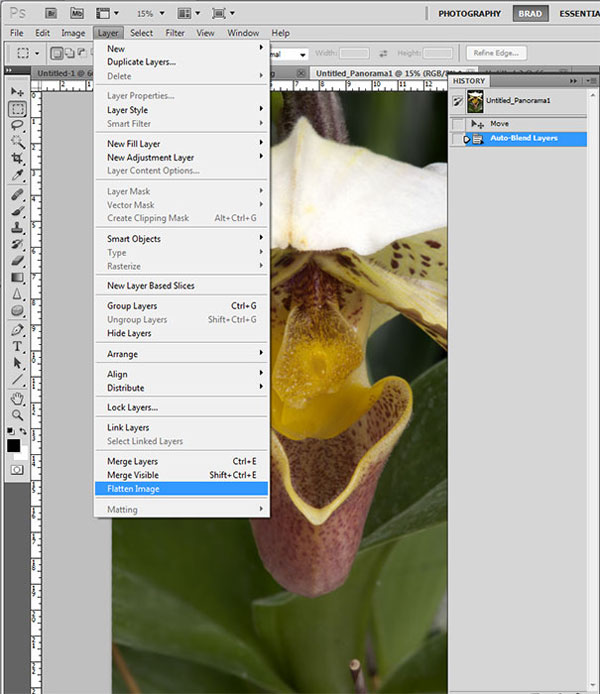
Now you are ready to edit the image like you would with any other image, such as cropping, adjusting levels, etc.
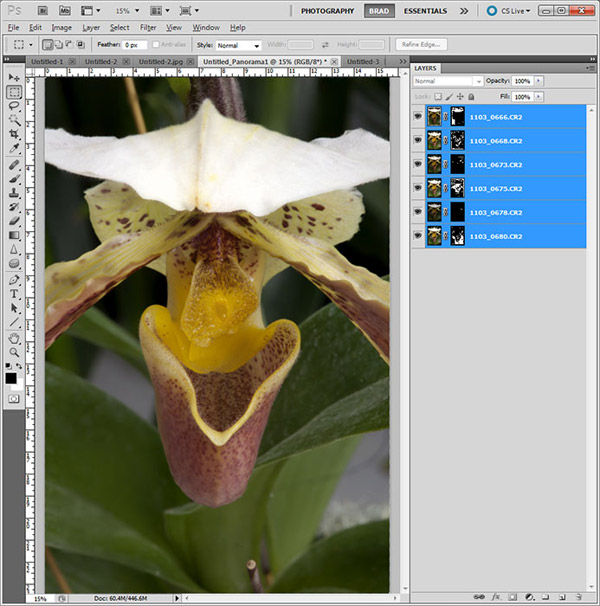
This is the final image, where the entire flower is in focus, including the hood and pouch (my scientific terminology), while the background is slightly blurred.

Method Two: Layers
I like using this method because it gives me more options and control. I can see what each layer looks like. If the focus stacking does not work, I can go back and see which layer is causing the problem and remove it. As you can see below, I can walk through the process one step at a time, and make changes as necessary.
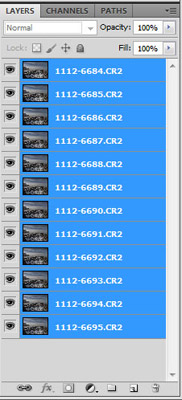
1. Open all the images you are going to use into Photoshop CS5.
2. Combine all images into one file. Start with the first image you shot and then copy and paste each additional image on to that image. This now creates numerous layers on the first image file. This is your opportunity to check the small details to see if there are any issues that need correcting with any of the layers.
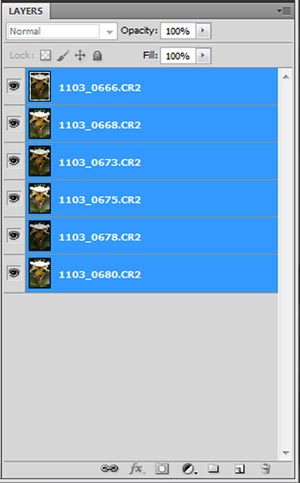
3. Highlight all of the layers.
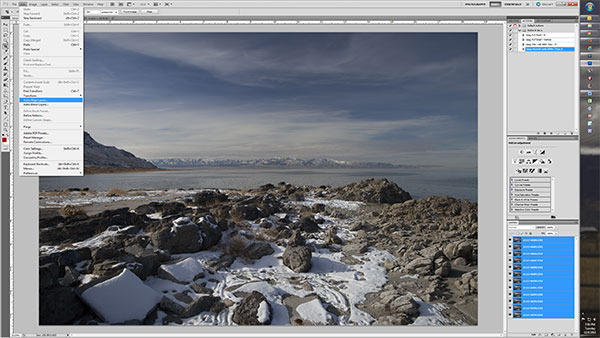
4. Align the layers by going to Edit -> Auto-Align Layers -> Collage (from here on, the steps are the same as above).
5. Blend the layers: Edit -> Auto-Blend Layers -> Stack Images
6. Flatten the layers by going to Layer -> Flatten Image
7. Crop the image and edit as you would any other image.
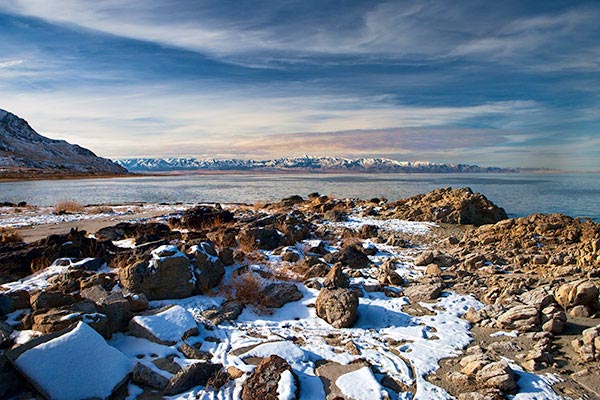
The image used in this example was shot at 1/200 sec. at f/7.1, ISO 100.
Focus stacking is becoming more and more popular as cameras and software get better and better. It is a great way to increase your DOF without losing image quality. I’m am looking forward to the day when this feature will be built into the cameras the same way Automatic Bracketing is now.
by Brad Sharp
All Text and Images: © 2011 Brad Sharp. All rights reserved.
Leave a Reply