
Thus far in this series, we’ve laid the “groundwork” (so to speak) for capturing great aerial images. We’ve looked at some of the equipment (both aviation and photographic) best suited for the aerial environment. And we’ve discussed some common camera settings used to get consistently good, sharp photos.
Now, let’s take all that we’ve learned and put our newfound techniques to work – let’s go flying!
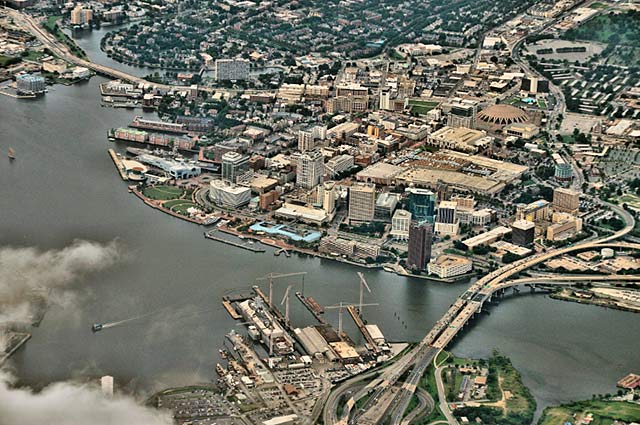
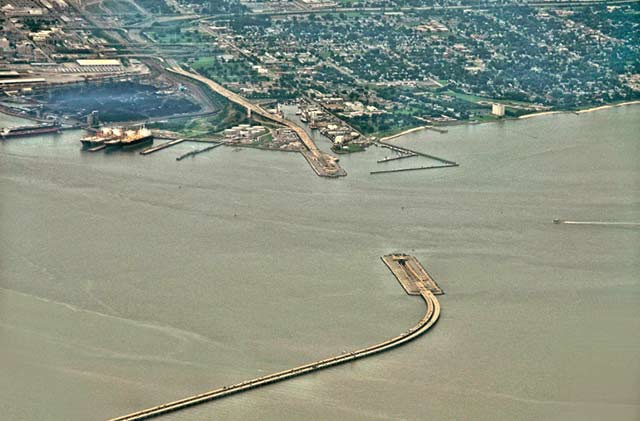
Riverfront along Downtown Norfolk, Virginia
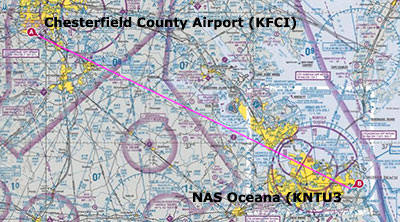
Flight plans are typically made according to “How the Crow Flies” – shortest and straightest distance between two points.
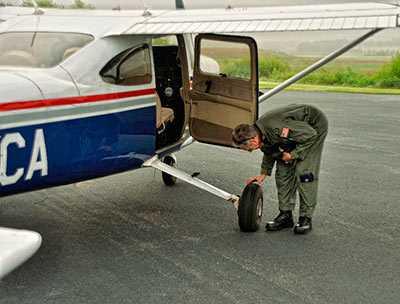
Make sure the bird has all its feathers – and good brakes
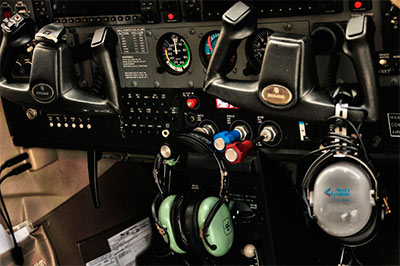
Radios – check. Flight instruments – check. Communications equipment – check.
A Real Adventure
Let’s take a trip. We’ll fly from Richmond, Virginia to the Tidewater areas of Norfolk and Virginia Beach. For those of us fortunate enough to live close to coastal regions, the landscapes and waterscapes are constantly changing and are a never-ending source of fascination. But even if you don’t live near the coast, any landscape – no matter how desolate and featureless – has a certain beauty when viewed from altitude.
Preparation
In anything we do – flying, photography or cooking – preparation is a key factor for success. This is especially true in aviation since there are so many factors that are out of our control, and we have to learn to deal with them. So first, let’s plan our flight from Chesterfield County Airport (KFCI) to NAS Oceana (KNTU). We see from our sectional map (reproduced here from our online flight planner) that the distance is 79 nm (nautical miles).
We will be flying a Cessna 182 (a four-seat, high-wing aircraft) at an air speed of roughly 125 kts (about 140 mph), so our flight plan says the trip should take about 30 minutes. How long it will actually take, of course, depends on the winds aloft – tail wind or head wind. Ah, that’s why one does a weather briefing!
Let’s fly!
6:00 am – arrive at airport: First things first – preflight the exterior of the airplane.
Next, inspect the cockpit.
6:30 am: Let’s get our weather briefing. Uh, oh! The National Weather Service says we are ground-bound due to fog for at least another hour.
Besides the safety considerations, we don’t want to take off under these conditions because we wouldn’t see the ground – can’t see, then there are no images to make!
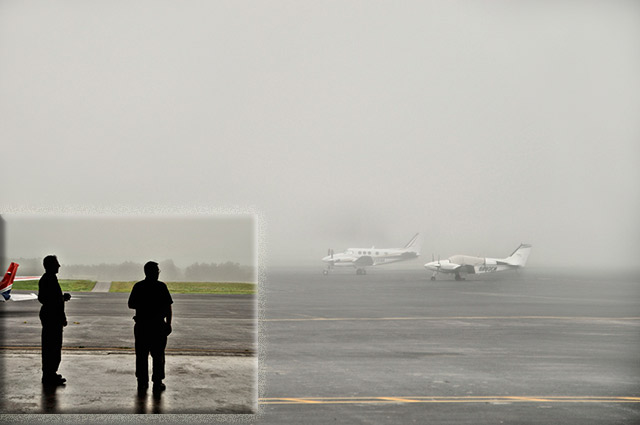
Nothing to do but wait it out. Nobody’s going anywhere until this stuff lifts.
8:00 am: The weather improves enough that we can get airborne. Let’s program our flight controller to take us where we want to go – NAS Oceana.
8:15 am: We’re airborne! Cleared to an altitude of 5,000 feet, we start taking pictures as soon as we rise above the cloud layer.
Technique
First, if at all possible, set your camera to capture in RAW image format (further explanation in the post-processing section below).
On the way up, we’ve metered the scene so we have a good idea of the camera settings we’ll use. We’ve set the ISO to 200. A few test shots later, we see that 1/500 sec. at f/6 should give us some good results.
Tip: even with optical stabilization found on modern cameras, it’s a good idea not to let the camera touch any part of the aircraft. In fact, the only thing the camera should touch is your two hands – your body makes a great shock absorber.
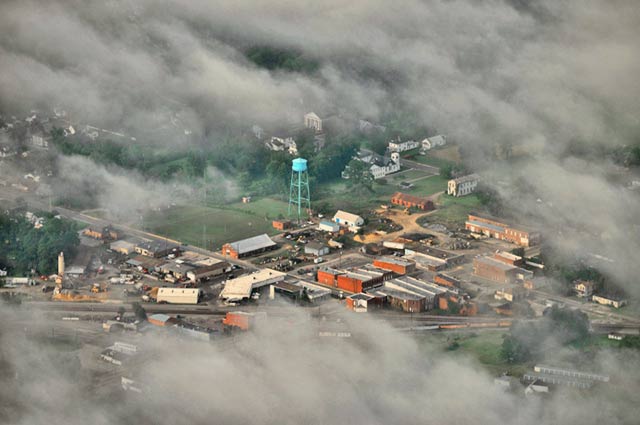
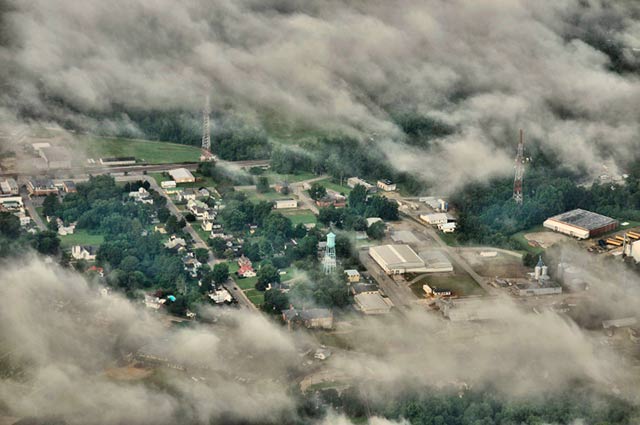
Since weather can be very fickled, the landscape plays a game of hide-and-seek. Many small towns look alike from the air. They can often be identified by the water tower.
In a quick aircraft like the Cessna 182, you’ll often find that you’re moving too fast to open the window and you’ll have to create you images through it. That’s generally not a problem as long as the window is in good condition and clean (we did clean the windows before departure, right?). Shooting through the window is another good reason why we don’t use filters on our lenses.
If we’re flying at a slow enough speed (below 90 kts – 103.7 mph) to open the window, we will often get clearer, sharper pictures. But there’s a tradeoff – even at 90 kts, the wind rushing past you has the same force as a Category 1 hurricane.
Holding the camera steady in these conditions can be a challenge. Brace your shoulder against the back of the seat and try not to let the lens barrel extend beyond the window frame. Be aware that with the window open, the cabin will be very loud – good reason to use a quality headset for clear communication with your pilot.
It’s a good idea to frequent breaks while photographing from the air. Prolonged periods of looking through the viewfinder can sometimes induce airsickness, so take some time to enjoy the scenery and plan your next photo.
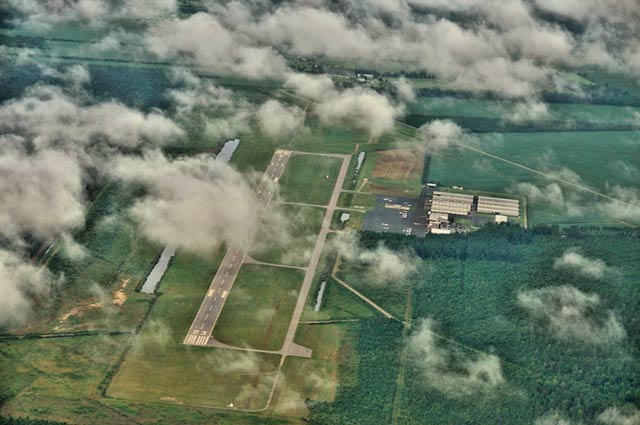
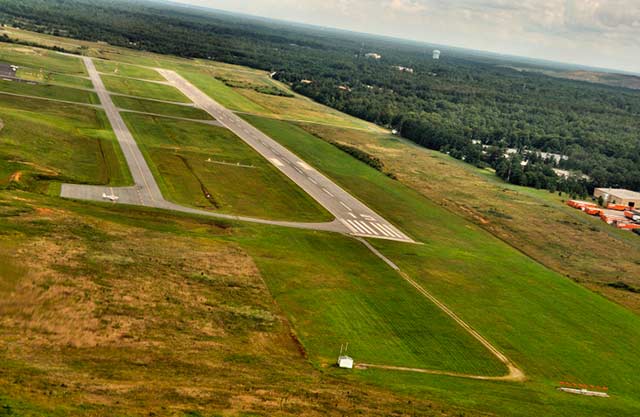
Fun activity – spot an airport by using Visual Flight Rules. Identify it from the sectional map in your lap and you’ll know exactly where you are!
9:00 am: We’ve arrived at our destination airport. Assuming that you don’t have any flying duties (like co-piloting), you can capture the entire landing sequence from final approach to touchdown. This is an experience you simply can’t get while flying in a commercial airliner. When you show these pictures to friends and family, an often-heard reaction is, “Wow!”
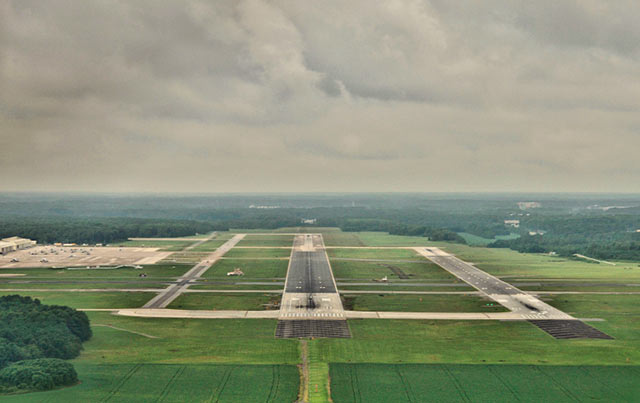
Final approach to Runway 23L at NAS Oceana.
Now, take a break. Stretch your legs and hydrate. Drink plenty of water because altitude speeds up your natural dehydration. Be sure to take a bio-break before getting back on board for the trip home – there aren’t any rest stops at 5,000 feet!
We Have Arrived
Before returning home, we’re going to fly around the Norfolk and Virginia Beach area, log some air time and see the city and its environs in a way few people get the chance to experience. We’ve checked the weather again, and there are a few thunderstorms here and there between Norfolk and Richmond, but nothing that we can’t easily avoid by flying around them.
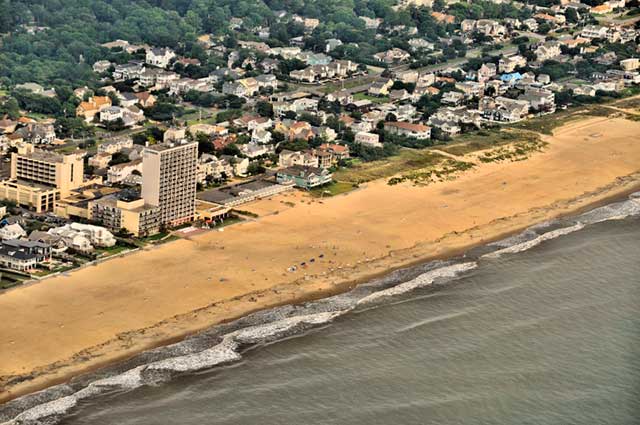
Virginia Beach Oceanfront
Let’s Head Home
It’s afternoon now, and as is typical for the season, the clouds are building into massive structures, often precursors of thunderstorms. Atmospheric instability can make for a bumpy ride, which makes aerial photography even more of a challenge. And if we look at our sectional map, we see that we’re flying almost due west – right into the sun.
Remember in an earlier installment of this series, we talked about how you have only one light source. Especially early in the morning or late in the afternoon, it’s important to know where the sun is relative to your direction of flight, and at what angle the sun appears relative to the earth’s surface.
It’s very common to encounter glare reflected from the surface, especially if that surface happens to be water. Another condition you will likely experience is increased atmospheric haze, which becomes more apparent as you increase your altitude. As a general rule, you’ll want to stay below 3,000 feet above ground level for the best photographic results.
On the return trip home, the landscape will appear very different because it’s a different time of day and you’re approaching it from a different angle.
Assuming you are sitting on the same side of the airplane, you’ll be seeing everything that you didn’t see on the outbound trip – more photo opportunities!
And when you see your home airport just ahead, you’ll realize what an incredible photographic experience you just had and you have lots of photo memories by which to remember it.
Post-processing
The flight’s not over until the aircraft is parked and tied down. It’s been a good day and your SD card is full of wonderful aerial images. Now the fun begins – processing and editing your photos.
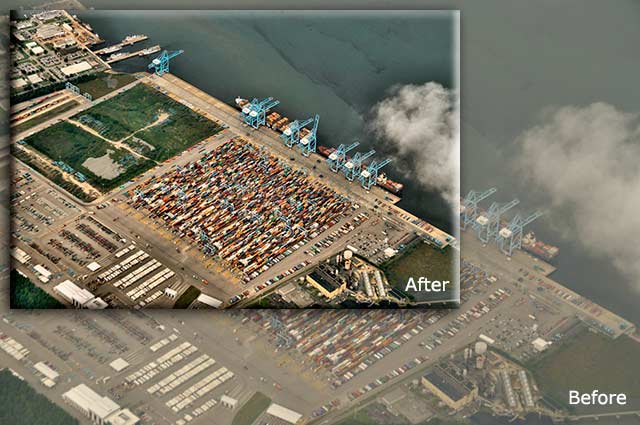
As I noted earlier, atmospheric haze is a challenge you will nearly always encounter. You might remember that I advised against using any filters – even a UV haze reduction filter. Why? The incremental improvement offered by a haze reduction filter is not worth the degradation in sharpness induced by a filter.
Thanks to digital technology, there are ways to mitigate the haze and color casts through the use of photo-editing software.
Here’s how:
All of your photos were made in the RAW image format. These images files are like digital negatives – all the information captured by the sensor is in these files. Nothing is stripped away as it is when compressing to the more commonly used JPG format.
All that extra information is critical to your ability to enhance your photos. Another advantage of RAW over camera-processed JPG is that it is extremely difficult to modify the white balance of a JPG image. Aerial photos are very prone to pronounced color casts, especially in the blue part of the spectrum. RAW-processing software provides a great deal of flexibility in dealing with these color shifts.
Perhaps even more important than dealing with white balance is being able to alter the tonal contrast range of your image. Manipulating contrast and color saturation can do what no filter can even come close to doing.
There are lots of software utilities available – it really doesn’t matter which one you use as long as it allows you to control highlight, mid-tone and shadow contrasts independently. A digital technology called high-pass sharpening, used in conjunction with contrast control, can make visible the information contained in a RAW file – information that you might not necessarily see when looking at an uncorrected image.
Here is an example of how this can work:
Into the sunset
I hope you have enjoyed this series of articles and have found them useful in your pursuit of photographic excellence. Aerial photography is a challenge, but extremely rewarding.
by Allen Moore
All text & photos: © 2013 Allen Moore. All rights reserved.
Leave a Reply