
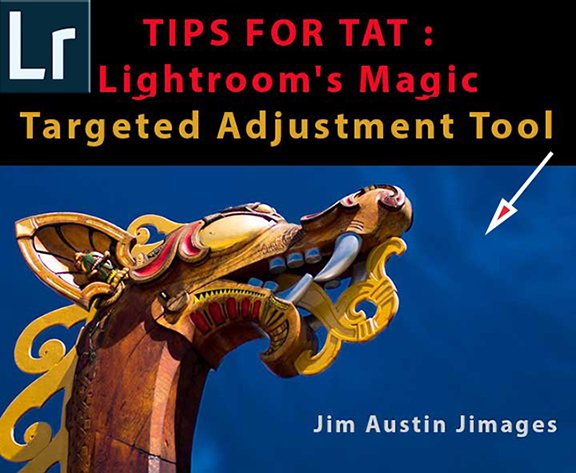
A Magic Tool: Targeted Adjustment Tool
Learning to master color in Lightroom can vastly improve our photographs. When I teach Lightroom to photo students, we learn many of its hidden tools. One of these secretive tools is a lot like Harry Potter’s Phoenix wand. It lets you become a color wizard. Let me present Adobe Lightroom’s Targeted Adjustment Tool (TAT), your magic want for changing color properties.
Understanding how to change properties of color is a useful skill. Anybody can saturate an image, but with the TAT we’ll shift color hues, change the brightness of a range of color, simplify color, and make our subject matter more luminous and clear.
FINDING THE TOOL
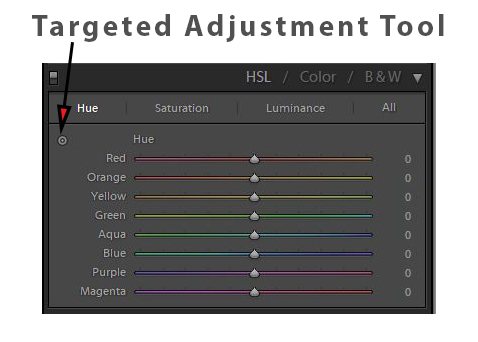
Lightroom’s Targeted Adjustment Tool (TAT) is the small circular dot under the word Hue, located in the Develop Module panel that is labeled HSL / Color / BW panel. The TAT lets us make powerful changes to the properties of colors. With it, we can selectively change the color range in an image by its property. By color property we mean its hue, saturation and luminance (brightness).
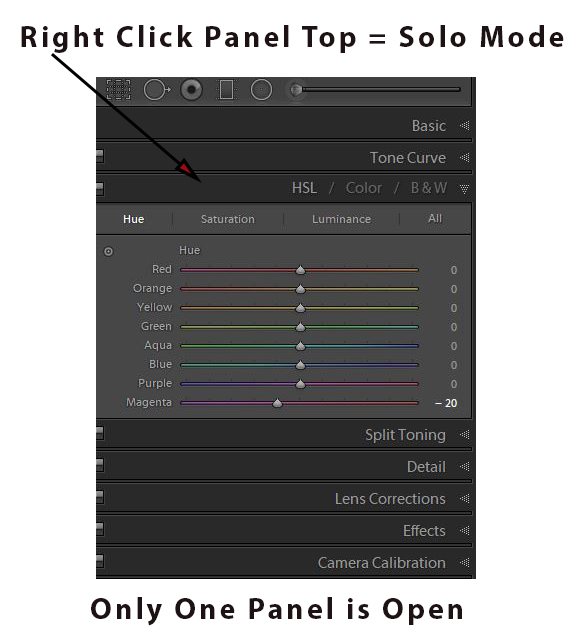
WARM UP: open Lightroom and select the Develop Module. Before we begin the tutorial steps, let’s make sure just the HSL panel is expanded, and collapse all the other panels. Right Click on the top of the HSL panel and scroll down to CLICK Solo Mode. This displays only the one panel you are working on, hiding the rest, so we no longer have to scroll between panels.
TUTORIAL FOR LIGHTROOM’S TARGETED ADJUSTMENT TOOL
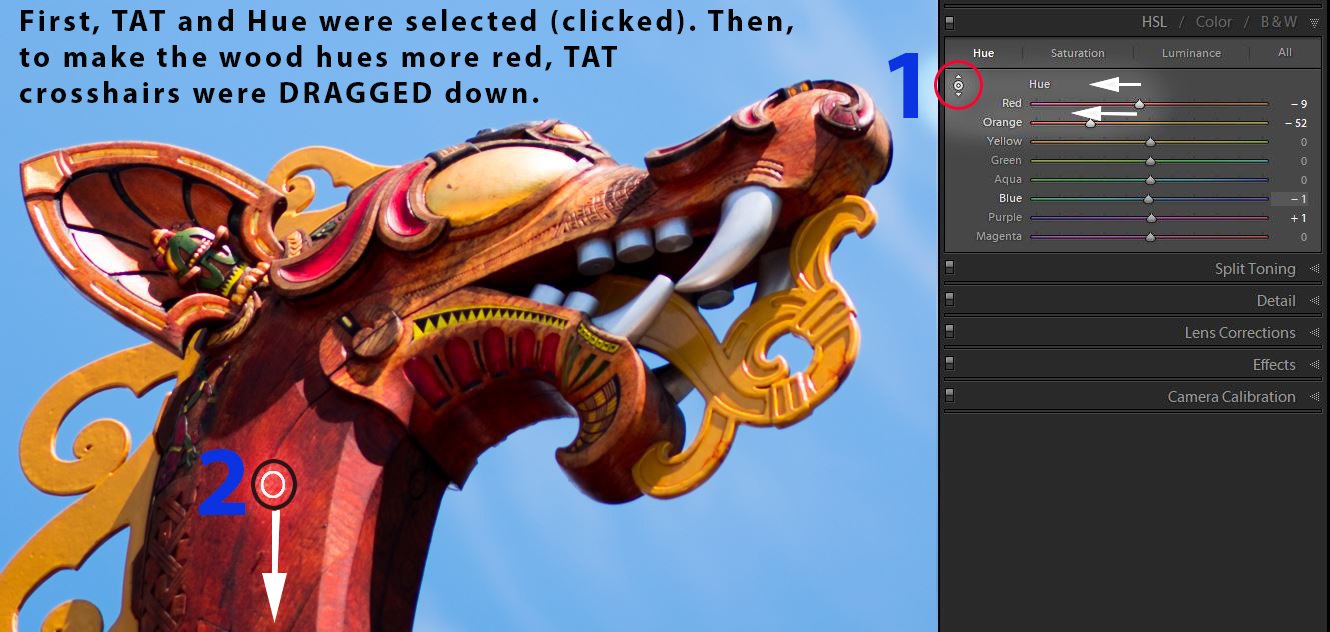
1) START: With the HSL (Hue-Saturation-Luminance) panel open, we see HSL / COLOR / B & W at the top of the panel. First step was to click on the word Hue.
- Next, we click the targeted adjustment tool (TAT), the dot under the word Hue. Click in the image preview, and we see the cross hairs of the tool appear in the preview.
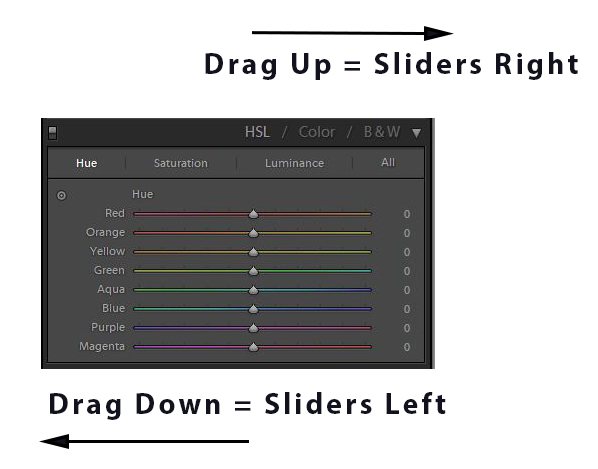
- Drag the cross hairs to change the range of color beneath them. Drag UP and the HUE SLIDERS move to the right (blue hues change to deeper purple).
- Drag DOWN to move the Hue sliders to the left (blue hues become more teal). While it may look like saturation and luminance are changing, only the Hue is changing. To reset the Hue sliders, just double click on the name of the color you have changed (red, or orange). Have fun and play around with the tool get the feel of dragging it up or down to make changes in the color properties.
2) DRAGGING THE DRAGON: In the example below, the tool is put to use. First, I shift the Hue sliders with the TAT tool. Then, the hues are reset, and Luminance sliders are shifted. To shift the hues of the wood carving of a dragon on a Viking ship, the TAT Hue cross hairs were positioned over the wood area which is made up of a range of red and orange hues.
Then, I dragged the TAT cross hairs down. This shifted the wood’s hues to deeper red-orange colors, making the ship’s wood tones more closely match the colors in the scene.
3) Now, having used TAT for HUE, we’ll try it with Luminance (brightness). We are still working with the Develop Module, in the HSL menu tab. So, on to changing the Luminance sliders with the TAT tool…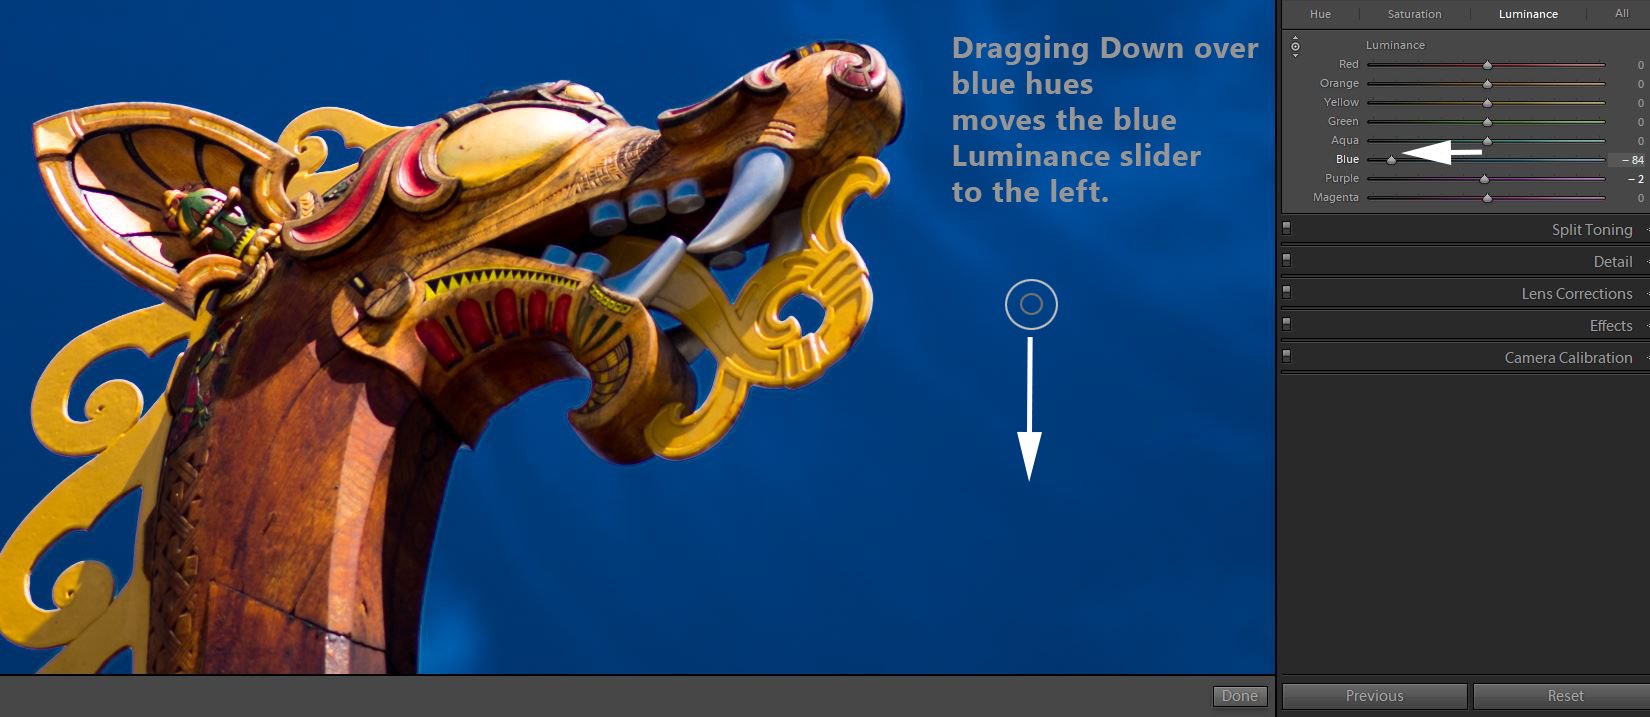
3) ABOVE Parts A and B: A) First, I double clicked the Red and the Yellow slider triangles. This reset the hues of red and yellow to their default of zero. B) Then, the Luminance tab was clicked in the HSL module.
Here is the power of the TAT magic: DRAGGING DOWN over the sky color range changed the Luminance (brightness) of the blues in the dragon’s sky, under the cross hairs, to a darker, deeper richer blue. Clicking DONE applies these TAT tool changes.
To clarify, this large change in the image was accomplished quickly by selecting an approximate area, without any time-consuming selections or the need to pick a specific color in a menu.
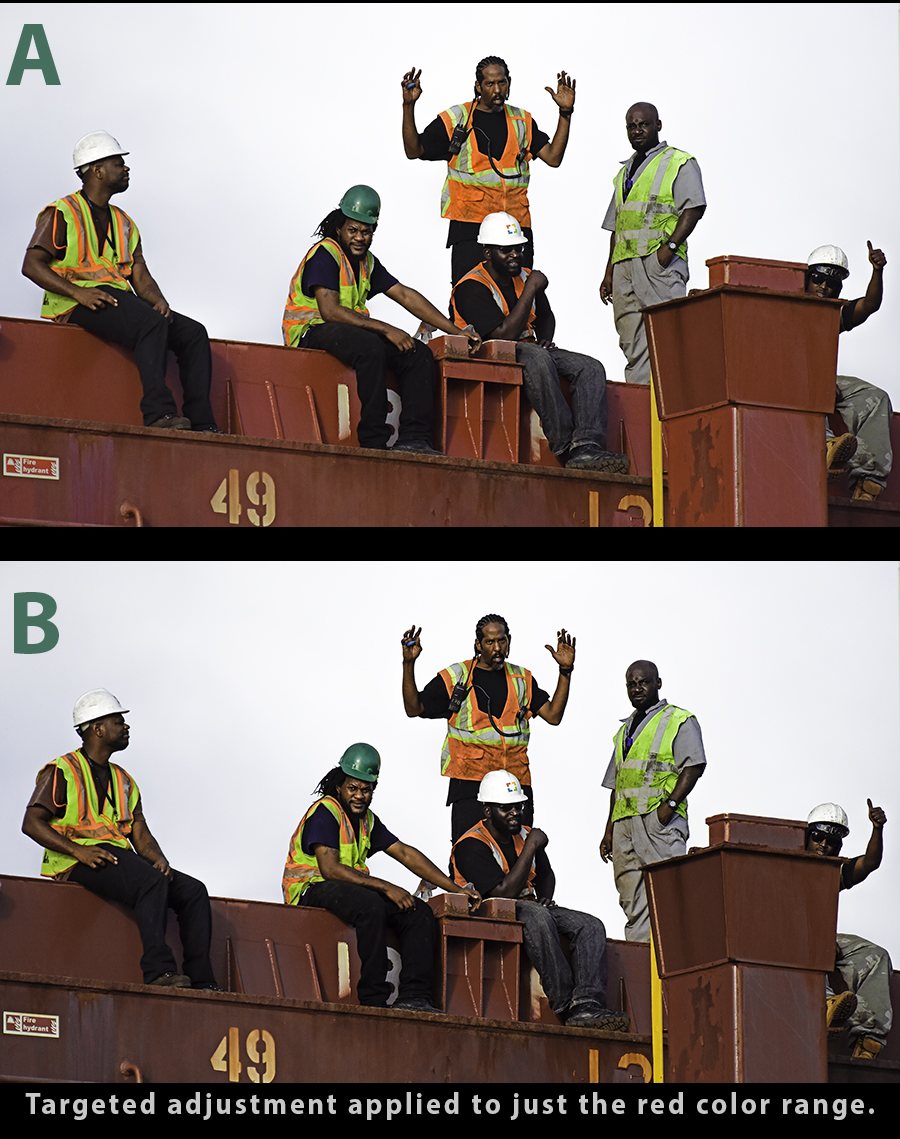
5) MERCHANT SHIP CREW: In this last example above, the red hues of the ship were too saturated, making them dominate the image (A=Before, B=After). I wanted to make these reds slightly darker and a bit less saturated as they detracted from the portrait.
To reduce both the luminance and the saturation, I DRAGGED YUP with the TAT crosshairs, across the red hues at the bottom of the image, using both the Luminance and the Saturation tabs, and this made the red less bright and less saturated simultaneously, which I hope shifts the attention to the people in the scene.
A final step in the (B=After) image was to boost the contrast, and slightly lighted the entire image in Lightroom’s Develop Basic Module. The goal of this example is to highlight what the “Targeted” aspect of the tool is, because while the red color range was changed, the blues, greens and oranges were not affected.
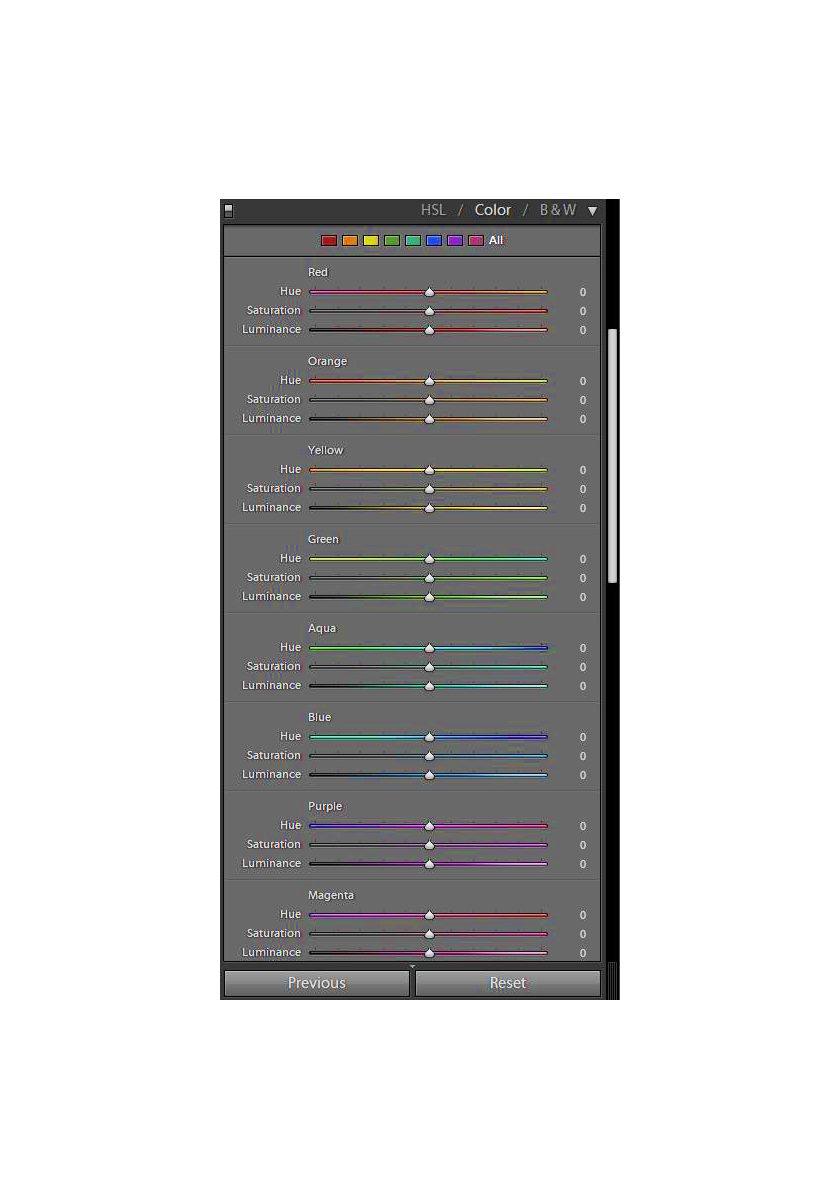
6) FINISH: If you like, click on the COLOR tab (shown above). Lightroom will open the drop down, which shows the changes or edits in the H, S and L sliders for each individual change made with the TAT tool. In the example above, I’ve reset all the Color tab sliders back to default, but you get the idea.
REVIEW
The advantage of the Targeted Adjustment Tool is how it lets you modify color properties easily and quickly. When we position the cross hairs of the Targeted Adjustment Tool, wherever we click in the image Preview, Lightroom will automatically select the color underneath.
Instead of guessing whether a tone is found in the middle of the curve or more toward the shoulder, we just click the cross hairs in the area we want to modify. Then, with just a single movement, we may saturate or desaturate, shift the hue, or easily change luminance.
Like a magic wand, the TAT tool is powerful enough to make creative changes to these properties of color, so you can get the precise colors you need for your photography.
Author: Jim Austin, Jimages, M.A. ACE is an Adobe Certified Expert. He lives aboard the catamaran Salty Paws. Austin is a photography educator, workshop leader, and coach for visionaries who want to empower their photography. Find out more about Jim here.

Leave a Reply